
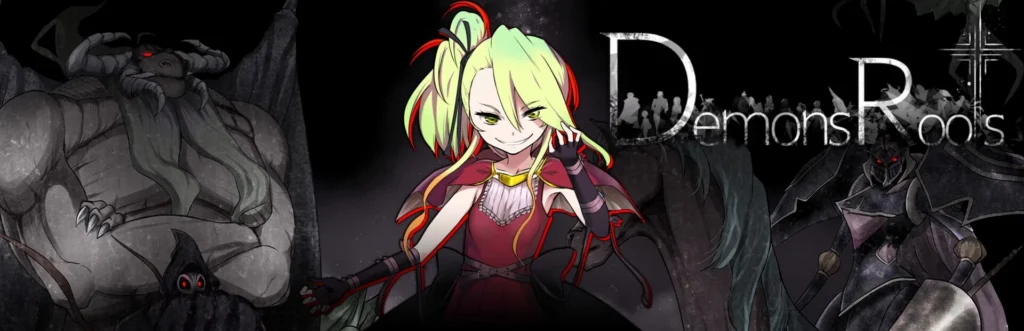
Demons Roots Walkthrough / Review

This article is a strategy article for “Demons Roots”
Story introduction
A long time ago, the demons and their king, the Demon King , ruled the continent. However, the Demon King was defeated by
the humans due to a certain incident, and the demons lost their king and their territory and began to migrate in large numbers
to escape the humans’ hunt for their remnants. Even so, it was extremely difficult to escape the clutches of humans, and all
races were driven to extinction.
Among the once-feared demons, there are now only six powerful apostles, and the demons are about to give up on survival,
but suddenly pitch black darkness spreads over them. The demons decided to jump into the darkness to escape from the
humans, but what they found beyond that was a dark world, a land where darkness and death spread.
The long-lived demons were surviving on a dead land where poisonous rain falls and crops cannot grow, but there are people
who want to return to the land overflowing with life and light where humans live. The number increased as the days passed.
One day, young demons who were born and raised on the Dark Continent returned to the surface and tried to communicate
with humans in order to coexist with them, but the humans became frightened of the demons and the young demons were cut
into pieces and died.


The demons were acutely aware that there was no place for demons in the world where light pointed to them, but as if to add
insult to injury, the dark world also began to collapse. The demons, who could no longer do anything but wait to be
exterminated, began to move to fight and win their lives, even if they were going to be destroyed anyway, and began
preparations for a large-scale war.
The protagonist, Despolica, who has the appearance of a human girl despite being a demon, decides to join this war with her
fellow demons to “conquer the world” in order to reclaim their world that was stolen by humans…
Impressions/Reviews
① Unique characters and dense scenario


The main goal of this work is that the protagonist, the demon Despolica , works with her friends and demons to gradually
occupy human territory, defeat the Empire, the strongest nation on the continent, and conquer the world. The human race that
lives in this world has the great power to eliminate demons, and has an overwhelming military force compared to the demons,
who are on the verge of extinction. Furthermore, since demons are hated by humans, almost every nation stands in their way as
their enemy.
The continental nations allied with the Empire, who oppose the protagonist and her fellow demons, often engage in inhumane
acts. Among these, the treatment of enslaved humans is particularly atrocious. Once enslaved, humans are sent to slave
camps, where they are thrown naked into nests of vicious monsters, and their desperate resistance is broadcasted worldwide
as entertainment. Inhumane practices like these are rampant. The fear of the consequences for defying the Empire is deeply
ingrained in humans, and many nations are manipulated by the Empire’s desires. They employ all means to attack demons in
order to destroy them.


In this battle, the protagonist Despolica and her companions all have unique personalities, making it easy to grow attached to
them. The protagonist, Despolica, basically takes advantage of the fact that she looks like a human in order to expand the
territory of the demons, and her main purpose is to infiltrate enemy countries and capture the kings and rulers alive to conquer
the territory. It’s a role.
However, perhaps because she had lived an oppressed life in the dark world for many years as a demon, when she sees
humans being oppressed like slaves in the human world, she is unable to leave them alone and helps them even though she is a
demon. The main character has a charming personality that makes you feel like you’re in trouble.
Remnant Mobius, who is a demon like Despolica, is said to be the strongest swordsman among the demons, and has a
personality that likes to fight against strong people. However, as the story progresses , Despolica’s character becomes more
virtuous, such as seeing how Despolica does not approve of cruel acts towards humans, and helping and sheltering humans
who are about to be killed. He will also grow into better swordsman .


Ange, a slave knight who was enslaved after their homeland was defeated, initially harbors hostility towards the demons who
threaten human lives for their own convenience. However, after witnessing a scene where demons, who are at risk of being
killed, rescue humans whom the Empire treats as disposable, trampling their dignity like trash, Ange begins to cooperate with
Despolica’s group as their ally. The characters who become allies include a variety of unique individuals such as a serial killer
and people from other worlds, making the scenario dense and filled with charm, making you eager to progress further and
discover unfolding developments.
②Dynamic battles and fulfilling elements


This game has a symbol encounter system, and a battle starts when you come into contact with an enemy in a dungeon.
Battles are fought using the traditional command selection method, and you will combine a wide variety of skills to devise
strategies to face powerful enemies.
Characters who become companions acquire powerful skills called secret techniques through leveling up and events. Although
the TP consumption rate is high, when activated, a powerful attack is activated along with a cut-in with a flashy effect, allowing
you to enjoy dynamic battles that can quickly advance the battle to your advantage.
This work has a lot of elements to play , and the dungeon has hidden rooms and hidden items, so it has a charm that makes you
want to explore every corner. Additionally, there are plenty of achievements that can be earned by defeating powerful enemies
and fulfilling hidden conditions, making this work extremely fulfilling in terms of replayability.
③ Earn money by prostitution in the erotic kingdom


In order to deal with powerful humans, money and information are essential. The best place to solve such problems is a special
kingdom called Doremi Fuckingdom. All kinds of information is bought and sold in this kingdom, and it is a facility where you can
obtain information such as powerful equipment and hidden rooms using special currency that can be obtained by participating
in erotic attractions in the kingdom. .
When entering this kingdom, it is customary to wear a special costume, and in the case of Despolica, she was forced to wear a
costume with nipples and a modified sailor uniform, and in the case of the slave knight Ange, She will be cosplaying as a bunny
girl .


When participating in erotic attractions, you will need to consume items called spirit stones to spin the gacha. Depending on
the result of the gacha, the clothes in the H scene and the man you are partnering with will change, so there are 3 different
types of the same H scene. A special performance plays when you spin the gacha, and if you hit the SSR, you can get a large
amount of coins.


In Despolica’s case, she ends up servicing him with a footjob while riding a man at an attraction called Queen Castle. She has a
sadistic personality, and while looking down on the man, she deftly moves her legs and handles his dick, leading him to
ejaculate. In the case of SR, it will be a normal costume, and in the case of SSR, it will be footjob play completely naked.
In the case of Ange, it will be a titty fuck service using her big breasts that were noticeable even when she was wearing a
regular costume. Also, although Ange is a former slave, she is a virgin because her previous master was incapacitated, but if
she loses her virginity at a facility in the kingdom or at an event in the story, she will be able to receive more extreme play such
as real play in the missionary position. You will be able to collect funds and information to fight against a powerful empire by
prostituting your friends in a naughty kingdom.
④She was defeated and turned into a meat urinal in a slave camp…


If the main character is defeated by the enemy in battle, the game will not end immediately, but instead you will be sent to a
slave camp to see the bad ending of how Despolica and her friends ended up as slaves. First, Despolica and her friends were
taken to a slave camp and had their prisoner numbers engraved on their chests while a rod-like device was mercilessly thrust
into their pussies as proof that they were prisoners.
The rod-shaped device has the effect of absorbing magical power and making the woman horny, and the woman is kept r…d
for a month in a facility called ” Imashime Prison ” where she is thoroughly r…d over and over again. In the diary in the prison,
you can see what kinds of abuses were carried out over the course of a month, and this diary is available to all of your
companions.
Some of them have had their bodies modified, and in Ange’s case, her body was given multiple doses of medication, which
caused her breast milk to gush out, and she had to be fitted with a milking machine designed for dairy cows. It is almost
impossible to escape from this prison, and it is rumored that the only way out is through a facility called the Execution Dungeon.


In the execution dungeon, extremely powerful monsters are wandering around, and the protagonists must face the challenge
naked at level 1. The magic device in the execution dungeon allows you to obtain recovery items by listening to commands, but
the commands are often sexual and are extremely humiliating, yet the scenes are broadcast nationwide. It will be. In Despolica’s
case, she was ordered to urinate in front of the device, and her body, which had been trained for a month, became excited just
by urinating in front of a large group of people. She will be ended up climaxed.
Also, if you are defeated in the execution dungeon, you will be able to see the heroines’ appearances until they are executed . In
Despol1ca’s case, she was publicly r…d using a dildo with a 40 cm bull’s dick while her body was restrained as bait to lure out
the demons. She ends up living a miserable life, following the orders of enemy men in order to protect her captive kin.
In Ange’s case, she ends up living as a slave prostitute who travels around the battlefield, and is r…d by more than 30 soldiers
every day in order to protect the knights of her homeland. She has a very thick vibrator inserted into her vagina and anus like a
toy, and is made to deep throat by soldiers, and ends up spending her life fawning over men until she is officially executed.
⑤
⑤ Impressions/Reviews
Circle ” Quick Nail Aristocrat ” is a circle that produces doujin games such as ” King Exit ” and is characterized by long, long-
playing RPG works . This work is a full-length RPG that took four years to create, and the content is extremely well-crafted, not
only the game part but also the sex scenes.
There are two main types of H-scenes: the relatively erotic erotic scenes of prostitution within the kingdom, and the brutal
r…s and r…s that take place in slave camps. In particular, I liked the sex scene in the slave camp, where you can see the
portraits of the main character and her friends being completely humiliated, and the sense of despair that comes across as ”
There’s nothing we can do…? ” If you are not good at extreme scenes, you can rest assured that you can clear the game without
any such events.
The game part is also full of content, with plenty of elements to enjoy, such as basic battles, exploration elements in dungeons,
and achievement elements, and the difficulty level can be adjusted, so anyone can enjoy it. It becomes. After clearing the game,
I played the entire game up to the second week’s elements for about 30 hours. I think this is the perfect work for those who like
doujin games that can be played for a long time and those who like humiliation games.
Q&A FAQ
QH scene full release?
There is no full release function for H scenes.
I watched a QH scene but it is not registered in the recollection.It
is designed to be registered in the recollection by saving after the H scene.
Q. Can’t beat the enemy
When fighting against powerful enemies such as bosses, it is important to attract attacks with Ange. A strategy that uses skills
such as ” Backwater Shield ” and ” Pull Off ” to evade enemy attacks is effective until the final stage. When it comes to
equipment, prioritize evasion rate and elemental resistance, and get the treasure ” Silver Spear of Wraith ” available in Singana ,
as it increases evasion rate by 20% and is an excellent piece of equipment that can be used until the end of the game. Also,
Despolica’s overall buff skills such as ” Nagi’s Root ” and ” Loki’s Thorn ” are powerful, so make sure they don’t run out.
In this game, recovery items can be obtained in abundance by exploring dungeons, etc., so you can use them without sparing
too much, and the balance is just right. (Excluding spirit soul stones)
Walkthrough
The drop items listed are only those that were confirmed during play.
The total number of items that can be obtained is also listed.
Prologue
Boheros Centenary Festival
Talk to the red-haired child and buy a helmet from the merchant in the northeast. You can get Topaz by talking to the man at
the bottom right of the bazaar.
After that, go west and you’ll have a tutorial battle with a man dressed as a demon.
After the battle, enemies will appear in the town. You can fully recover your HP by drinking underground water.
If you get behind the enemy, you can make a pre-emptive attack, so aim for it proactively.
If you go to the back, you’ll be in a battle with 2 evil-looking adults and 2 nice adults. There are places in the forest that you can
pass through, and there are demons hiding there as well. After that, go to the prayer path to the west and pray after the event
with the slave.
item
Recovery water (pot) x 2
hood
Recovery pure water (barrel)
recovery water
Fragment of power (hidden passage)
Holy Dragon Queen’s Hair Ornament (Hidden Passage)
Monster
/Good adult
/Evil adult
Achievements available
– Come on! Let’s go quickly! …Talk to the red-haired child
/Get the treasure! (Suri-Suri…Obtain a helmet)
/Get the treasure! (Nimanima…Speak to the man at the bottom right of the festival bazaar and get the topaz)
/Kishidanchogoroshi!…Defeat a naughty-looking adult
/Mazoku Metsubou!… Defeat all monsters
/Items in the forest…Obtain forest items.
Dark world
Operate Radadamon, meet up with the demon girl, and move forward.
After that, talk to the vestigial Todeira in the back and select Start Invasion.
In the battle with Boheros Knights member x2.
Available Achievements
: Welcome to DemonsRoots…Defeat 2 Boheros Knights members
Path of Prayer ~ Royal Castle
If you solve the stone statue’s trick, you can obtain the secret treasure ” Boheros’ Sword of Liberation”.
You can open the treasure chest inside the tent by entering the password ” 1936″.
Heads towards the royal castle, but along the way she encounters two battles with the Boheros Knights.
Gilhound Ladademon will leave the party after the battle.
If you go inside the castle part by part, the remnant Mobius will join you.
Once you reach the throne, you will have a boss battle. Learn the secret technique ” Demon’s Roots ” before the battle .
item
Boheros Liberation Sword (Treasure)
amulet
Revival medicine x4
Spirit stone x2
recovery water
fragment of life
bronze buckler
hidden items
item
place to check
item
place to check
bronze helm
tent
bronze plate
tent
ultimate scroll
password treasure chest
monster
monster
Experience point
money
drop items
Boheros Knights Spearman
40EXP
30G
Recovery water, perforated helmet
Boheros Knights Axman
50EXP
50G
Recovery water, scarred armor
Boheros Knights Magician
45EXP
50G
Mana, reviving medicine
Available Achievements
– Conquest of Boheros Kingdom… Defeat the Knight Commander
Boss Knight Commander
Chapter One
Royal Castle
Head to check on the demons in the hospital room. You can obtain a “book” by talking to the demon on the way to the throne.
You can view various information in the game on the bookshelf in the library, and you can also obtain items by examining it.
Afterwards, head to Boheros’ mansion. Talks to the demon outside the castle and she is there in an instant.
The demon who is burning books outside the castle will exchange books for general recovery items.
Let’s move from the mansion to the enemy country.
You can get 100,000 G from the vase in the Boheros mansion, which is a lot of money at this point.
item
Revival medicine x2
spirit stone
hidden items
item
place to check
item
place to check
recovery water
barrel
piece of luck
library bookshelf
scroll of return
library bookshelf
Book x 3
library bookshelf
Hinoki stick/50G
behind the throne
book
diner book
root turning
dining room
100,000G
Vase at the entrance to Boheros Hall
Tortoise Dungeon ~ Tortoise City
If you investigate the room of the man who says, “This prison is well ventilated…” you will be able to access a hidden room.
Proceed through the prison and get information about Lily Killer from a group of criminals, then examine the jar in front of the
large door and open the door.
After the event, when you go outside the Tortoise dungeon, you will see the H scene ” Slave’s Baptism ” and then a battle with
Tortoise Spearmen x3.
You can view the sub-event by heading to the stone monument in the upper left corner of Tortoise City.
item
Recovery water x3
Revival medicine x2
bronze clip
spirit stone
warrior’s bracelet
Daikon x2
hidden items
item
place to check
item
place to check
spirit stone
hidden room
100G
Female prisoner’s urinal
300G
inn shelf
recovery water
inn jar
monster
monster
Experience point
money
drop items
sludge
60EXP
10G
Puyo Puyo, Sakuraba, Sludge Dagger
Doro
75EXP
10G
none?
Skoll
120EXP
10G
fire needle
Available Achievements
– Tortoise strategy begins… Reach Tortoise
– Secret room unlocked! …Discover a hidden room in the dungeon
/Encounter with a murderer…Meet Lily Killer
Tortoise Palace
The enemies inside the palace are weak to water attributes, so we recommend equipping them with the Sludge Dagger, which
drops sludge .
After the battle with King Tortoise, go to the back and you’ll be in a battle with a white man.
After the boss battle, leave the palace and return to Boheros.
item
bronze buckler
piece of luck
Fragment of power (after defeating a strong enemy)
Fragment of protection (after defeating a strong enemy)
Falchion (after defeating a strong enemy)
Golden Wind (after defeating a strong enemy)
item
place
item
place
Turned roots x 2
barrel
Spirit stone x2
barrel
book
Book in the room to the right of the entrance
Recovery water x2
jar
Recovery water x 4
jar
root turning
jar
Revival medicine x3
jar
500G
jar
recovery pure water
barrel
Spirit stone x2
barrel
Book x 2
Bookshelf near strong enemy
3000G×5
hidden room
spirit soul stone
hidden room
monster
monster
Experience point
money
drop items
sludge
60EXP
10G
Puyo Puyo, Sakuraba, Sludge Dagger
Scarano
90EXP
10G
Sakuraba, Scarano Shield
tortoise spearman
95EXP
110G
recovery water
tortoise axeman
90EXP
110G
recovery water
Achievements that can be obtained
: Defeating a white man… Defeating a white man.
Conquering a small country of Tortoise… Obtained after returning to Boheros.
Defeating a magical creature… Defeating a powerful enemy.
Hidden property… Opening a treasure chest in a hidden room.
When the boss’s white
HP reaches 0, an event will occur and Lily will temporarily join your party.
Despolica should focus on recovery and have Lily attack.
Boheros National Farmland ~ Doremi FuckingDom
Operate Ange to harvest crops and put them in the box.
She then heads to Boheros’ mansion.
You will be automatically moved to Doremi FuckingDom after the event.
H events occur frequently in the kingdom, and you can avoid them with your choices.
Upon entering the country, you can obtain 10 Spirit Stones.
By watching the H event at the attraction, you can see various items and hidden treasures at the shop.
Exit the attraction and talk to the demon to return to Boheros.
Talk to Krowna and head to Singana.
Before heading there, talk to the woman near the exit of the castle to get “Spirit Stone x2”.
Singana
Proceeding forward, after the event with King Singana, you will have a battle with 2x Singana soldiers.
After that, if you are defeated, you will enter BADEND mode. If you choose to turn yourself in at a nearby hut, you can
immediately go to BADEND mode.
If you talk to Tordeira before leaving, you will receive ” Spirit Stone x2”. Ange will call out to the slave enemies that appear along
the way, and there is a certain probability that they will retreat. Enemies are weak to flame attacks, so fire needles etc. dropped
by Skoll are effective. If you solve the trick in the cave with the sapphire on the way, you will get a treasure. Go inside and you’ll
get to a boss battle.
item
Inspiration mushroom x2
Revival medicine x2
All-purpose mushroom x2
Wraith Spear
Revival medicine (barrel)
recovery water
spirit stone
sapphire
Wraith’s Silver Spear (Treasure)
piece of luck
monster
monster
Experience point
money
drop items
Singana Axeman
170EXP
400G
recovery pure water, recovery water
slave knight
100EXP
0G
Mana
sludge
60EXP
10G
Puyo Puyo, Sakuraba, Sludge Dagger
Skoll
120EXP
10G
fire needle
battlefield drumstick
130EXP
10G
Rikka
Singana Hammer Soldier
210EXP
450G
recovery pure water, recovery water
Gladiator (fist)
250EXP
100G
none?
Available Achievements
– Start conquering Singana…Defeat 2 x Singana soldiers
– Anonymous hero… Join up with the remnant Mobius
– Defeat the gladiator! …Defeat the gladiator girl
/Gem in the cave…Obtain the sapphire
Boss gladiator girl, macho gorilla
Ancient Fort of Singana
Enter the waiting room and get the ” Key to the Old Fort of Singana ” after fighting with 3 x Singana Axemen . Go to the bottom
right, unlock the key, and go inside.
The bat door along the way will be accessible in a later sub-event. The password treasure chest located at the bat door will
open by entering ” 4276 “. Talk to the slave knight hiding in the small room to get the Spirit Soul Stone. When you defeat the
boss, you will receive the ” Secret Key to the Ancient Fort of Singana “.
hidden items
item
place to check
item
place to check
Recovery water x3
jar
bronze plate
waiting room armor
bronze sword
waiting room sword
fragment of life
Hidden passage after boss battle
blue talisman
hidden room
Revival medicine x2
hidden room
ultimate scroll
password treasure chest
monster
monster
Experience point
money
drop items
Skoll
120EXP
10G
fire needle
battlefield drumstick
130EXP
10G
Rikka
Singana Hammer Soldier
210EXP
450G
recovery pure water, recovery water
Gladiator (fist)
250EXP
100G
none?
Available Achievements
: Conquest of the Singana Savage Countries! …Conquer Singana
/defeat King Singana! …Defeat King Singana
/Hidden Fortress Room…Find the hidden room
Boss King Singana
Chapter 2
Boheros national farmland
Crops can now be purchased by examining shipping boxes. When you head to Boheros Hall, you’ll be in a battle with the
remnant of Kraura. In this battle, even if you become unable to fight, Claura will revive you. After the battle, the status of both
characters will increase. When you arrive at the Boheros Hall, you will head to the Prana Trading Country. Several sub-events
will occur in the countries you have conquered so far, so be sure to check them out before you leave.
Items
– Turned roots x 2 (farmer)
– Lightning rod helm (farmer)
*Sub-Event*
– Treasure in the Dungeon
Talk to the slave man in Tortoise City and ask for information about the monsters in the dungeon.
Be careful as the monsters that appear in the dungeon are more powerful than before.
By investigating the wells in town, you can quickly get to the place where the treasure is.
After getting the treasure, check the toilet in the next room to go to the EX dungeon.
EX dungeons are random encounters, with high difficulty and strong enemies.
It’s a bonus element that has nothing to do with clearing the main story, so if you can’t win, put it off until later.
・Extremist Hideout
Speak to Scathach on the Shingana border to obtain the “Old Fort Bat Key”.
Head to the room you couldn’t enter in the Singana Old Fort.
You will be able to challenge the EX Dungeon Extremist Hideout.
・Ange Rescue Event
When you enter Singana Forest, an event will occur where Ange gets separated.
If you can’t rescue her within 3 minutes, an H scene ” Failure to rescue Ange ” will occur (loss of virginity)
Ange’s location is north of the part in the image.
If the rescue is successful, she will receive ” Spirit Stone x5 “.

Prana Trading Country
Once you enter the country, Remnant Mobius will join your party.
He goes to the slave market on the east side and after seeing the event he heads to the workshop.
When he reaches the backstage area, he is faced with a boss battle.
After winning, you can rest in the inn’s room, Mobius will leave, and Kalinka will join you.
item
fragment of power
chain mail
flame bow
Spirit stone x2
steel helmet
Fragment of reason
recovery pure water
Karin’s Bone Fist (Treasure)
hidden items
item
place to check
item
place to check
Revival medicine x2
jar
book
inn shelf
Book x 2
inn room
monster
monster
Experience point
money
drop items
sludge
60EXP
10G
Puyo Puyo, Sakuraba, Sludge Dagger
Doro
75EXP
10G
none?
coke
250EXP
60G
Antidote Fruit, Tail of the Wind
Skoll
120EXP
10G
fire needle
battlefield drumstick
130EXP
10G
Rikka
Available Achievements
– Start Prana Strategy… Reach Prana Trading Country
– Avoid rip-offs… Talk to the old woman merchant in the south of town
– Defeat the big bird… Defeat Roxik
Boss Roxic
Saint Coliseum
Go north at the crossroads in the center of the city and enter Saint Colosseum. First, conquer the eastern hunting area. Collect
100 poison fangs that Jinoo drops.
Jinoo will inflict a poisonous state in battle and it will continue even after the battle, so treat it with recovery etc. Also, monsters
that appear after this point are weak to wind attributes, so Coke’s” Tail of the Wind ” and Ange’s ” Wind Flash ” are effective.
Talk to the cerebral gladiator in the north and get ” Poison Fang x20″.
Talk to the fallen gladiator in the southwest to receive ” Poison Fang x5″.
After handing over 100 poisonous fangs, you will collect 3 types of water in the next desert area.
While carrying the jar, your abilities will be weakened , so be careful when fighting enemies.
In the final jungle area, you will fight against the remaining 4 teams.
Since the enemy is waiting, you can easily aim for a back attack.
Be careful as you will be damaged if you touch the round protruding floor along the way.
When you reach the end, you’ll be in a battle with a macho gorilla.
After you win, talk to Macho Gorilla to get a ” Spirit Soul Stone”.
After that, when you exit the area, you will fight a boss.
item
All-purpose mushroom x4
Poison fang x 125
gladiator armor
bronze knuckles
Fragment of Mamoru
spirit stone
Revival medicine x4
Antidote fruit x5
monster
monster
Experience point
money
drop items
Jinoo
200EXP
50G
Poison fang
coke
250EXP
60G
Antidote Fruit, Tail of the Wind
Gladiator (axe)
300EXP
300G
recovery water
Gladiator (Tekken)
300EXP
300G
recovery water
foreign swordsman
300EXP
300G
Mana
Roxic
750EXP
500G
Recovery Pure Water, Tail of the Wind
Available Achievements
– Saint Colosseum Start…Participate in Saint Colosseum.
・Gladiator’s Will… Open the treasure chest containing 50 poisonous fangs in the basement
・Defeat Macho Gorilla…Defeat Macho Gorilla
・Defeat King Prana…Defeat King Prana
・Conquer Purana, the trading nation… Defeat King Prana
Boss Prana King
Becomes poisoned, silenced, and has greatly reduced attack power at the start of battle.
This abnormal status cannot be canceled.
An event will occur after a few turns, so use recovery items etc. to survive.
After the event, the status ailment will be removed and the battle will begin with 2 reinforcement aides.
During the battle, Kalinka learns the secret technique ” Mission Strike “.
Boheros Agreement Park ~ Forest of Phantoms
As soon as you’re ready, head to the magic barrier Rukuruku. There is a hidden passage in the place where the wisp pops out in
the Forest of Illusions.
Once you pass through the Forest of Illusions, Remnant Mobius will join your party.
Monster House’s Fairy Guardian is a little difficult to deal with at this point, and the experience points are 0, so flee without
fighting.
After leaving the Monster House, the next destination is Torkia.
item
chain mail
mind cap
Spirit stone x5
inspirational mushroom
Limana
3000G×3 (hidden passage)
bronze rod
Spirit stone x5 (fallen gem)
Staff of the Chief of the Phantom Forest (Treasure)
monster
monster
Experience point
money
drop items
lightning wisp
400EXP
10G
none?
fairy guardian
0EXP
2000G
spirit stone
No achievements/strategies available ! …Exit the monster house.
Dragon Cave
A sub-event with a mysterious person can be seen on the stone monument to the right of the entrance.
You can also enter the central cave, but there is a powerful dragon in there, so take the side path to the left.
On the way, after the boss battle at the back of the H scene ” Slave Market “, the remaining Mobius leaves and Kalinka joins in
his place.
item
Recovery pure water x2
inspirational mushroom
All-purpose mushroom x2
Matsukaze mushroom
Sakuraba×2
High book (bookshelf)
shield necklace
warrior’s bracelet
Rusty ring (barrel)
Spirit stone x5
spirit soul stone
dragon backla
large tree shield
Dragon Armor (after defeating a strong enemy)
Dragon sword (after defeating a strong enemy)
Dragon Helm (after defeating a strong enemy)
monster
monster
Experience point
money
drop items
raid scareano
370EXP
10G
Inspiration Mushroom, Explosive Rod
torkian soldier
480EXP
400G
Recovery pure water, resuscitation medicine
battlefield drumstick
130EXP
10G
Rikka
dragon
2500EXP
1000G
dragon fang, spirit stone
Fafnir (strong enemy)
9000EXP
10000G
Fragment of life, Fragment of soul
Boss White
An event will occur after a certain number of turns, and Kalinka will join your party.
Gradius and mission blows are effective, so let’s fight mainly with Kalinka.
Available Achievements
– Start conquering Torkia… Reach the Torkia Kingdom
– Defeat the white one! …defeat the white man
/defeat the dragon for the first time…defeat the dragon
/defeat Fafnir…defeat a strong enemy
Torkia castle outer wall
After climbing the ivy on the outer wall, he escapes with the queen.
If you go all the way to the end, there will be a boss battle after the event.
The Wisp in front of the Treasure Chest of Destiny’s Explosion has a low chance of dropping a High Heel Hat.
item
stiletto heels
silver hair ornament
radical underwear
Sakuraba×2
All-purpose mushroom x4
resuscitation medicine
recovery pure water
resuscitation medicine
flame knuckle
Sakuraba
Inspiration mushroom x2
spirit stone
spirit soul stone
hidden items
item
place to check
item
place to check
Recovery pure water x2
barrel
high book
bookshelf
Recovery pure water x2
barrel
Spirit stone x10
Revisited after the boss fight
monster
monster
Experience point
money
drop items
ice wisp
800EXP
20G
ice knife
raid scareano
370EXP
10G
Inspiration Mushroom, Explosive Rod
torkian soldier
480EXP
400G
Recovery pure water, resuscitation medicine
Jinoo
200EXP
50G
Poison fang
coke
250EXP
60G
Antidote Fruit, Tail of the Wind
baby dragon
750EXP
10G
broken ring
lightning wisp
400EXP
10G
none?
Available Achievements
– Queen rescue mission… Climb the ivy on the outer wall of Tolkia Castle
– Defeat King Torkia… Defeat King Torkia
– Conquer Torkia… Defeat King Torkia
Boss Tolkia King
After a few turns, Ange will learn the secret technique ” Aegis Storm”.
If the enemy gives the Dragon Breath signal that they are “building up flames”, use Aegis Storm to block them.
House of Boheros
If you talk to Mobius in the throne room of the royal castle, you will receive a ” Spirit Soul Stone “.
When she is ready, she heads to the magic barrier Rukuruk.
*Sub-event*
: Kalinka Rescue Event
Occurs when entering the jungle area of Saint Colosseum.
If you are not rescued within 3 minutes, an H scene ” Kalinka rescue failure ” will occur (virginity loss).
Kalinka is located in the south of the jungle area.
If the rescue is successful, she will receive “ Spirit Stone x5 ”.

・Desert Bath
You can enter the impassable part in the center of the Saint Colosseum desert area, and if you enter the hole, you can go to the
EX dungeon underground hot spring.
After clearing the EX dungeon, Sahagin will be staying at the Boheros mansion, and if you talk to him, he will create a hot spring
for you for 100,000G.
If you make it, you will receive the achievement ” Hot of Salvation Completed! ”. You can now enter the hot spring, and a special
effect hot spring (5% TP recovery every turn) is given.
Magical barrier Rukurukku
As you move forward, there will be an H scene called ” Slave Education ” on the way, followed by a battle with the students and
Seiki committee members, and Lily Killer will temporarily join your party. In this battle, you can disable the barrier by dealing
3000 damage.
As you go deeper into the student dormitory, you will encounter a boss battle. If you win, you will have an event battle with the
magical creature Sarasa, and after that, if you go deep into Sarasa’s memories, you will return to Boheros.
item
Enhanced resuscitator x3
Limana
emerald
Spirit stone x3
Recovery pure water x2
silver hair ornament
thunder mace
lightning bow
thunder claw
Matsukaze mushroom x2
non-toxic ring
amulet
All-purpose mushroom x2
recovery ultrapure water
263 Ward Key (Administrator’s Room)
Spirit soul stone x2
Golden Wind
Golden Wind (after defeating a strong enemy)
Fragments of Law (after defeating a strong enemy)
hidden items
item
place to check
item
place to check
flame plate
armor
Recovery pure water x2
barrel
High book x 2
bookshelf
Book x 2
bookshelf, desk books
bronze rod
cane
flame plate
armor
design buckler
shield
High book x3
bookshelf
Book x 2
bookshelf
mega book
bookshelf
piece of law
shelf
Fragment of reason
shelf
lightning rod helm
helmet
Book x 4
room bookshelf
mega book
room bookshelf
monster
monster
Experience point money drop items
Fire and Ice Wisp
600EXP
10G
high heel hat, mana
skull knight
640EXP
190G
Recovery pure water, resuscitation medicine
earth breeze wisp
600EXP
10G
Mana
guardian gem
3100EXP
1800G Mana
Student/fire department committee member
740EXP
750G
Recovery pure water, Enhanced resuscitation potion
Student/Fukki Committee
750EXP
750G
Recovery pure water, Enhanced resuscitation potion
Student/Seikai Committee
760EXP
900G
recovery pure water
Available Achievements
: The home of the wall humans… Reach the magic barrier Rukurukku
– Pathetic miniature garden… Defeat the students and Holy Cheers Committee
– Hidden key… Obtain the key to Ward 263
– Defeat the magic devices… Defeat the magic devices Defeat
/Defeat magical plant creatures… Defeat strong enemy plant magic creatures
/Hidden save… Find the save at the end of the hidden passage
Boss magic devices
Defense of Boheros
When you return, the magic device Sarasa will join your party.
Talk to Gardemon and head to the Knights Training Grounds, where you’ll encounter a battle with the Human Liberation Army.
Sarasa is at the initial level, so review her equipment and use her book in advance.
If she defeats 8 enemies in the first area and speaks to the demon in the upper right corner, she will receive ” Enhanced
Revitalization Potion x5 ”.
Talk to the fallen demon at the entrance to the Knights’ headquarters and enter the building from the right side.
As you proceed inside the building, you will be in a battle with the Imperial Knight Roen.
If you go all the way to the back, you’ll get to a boss battle.
After the battle, move to Boheros Castle and watch the event with your boyfriend Mobius in the forest beyond the bazaar, and
the second chapter will end.
item
Mithril Spear
bronze sword
bronze spear
bronze rod
mithril plate
Spirit stone x4
mithril sword
Enhanced resuscitator x2
Recovery pure water x3
pearl
Golden Wind
magician’s staff
magic robe
Spirit soul stone (revisited after the boss fight)
hidden items
item
place to check
item
place to check
Turned roots x 2
food storage
Book x 2
bookshelf
High book x 2
bookshelf
Limana
Medical office
Recovery pure water x2
Medical office
Book x 4
bookshelf
High book x 2
bookshelf
3000G×2
shelf
Book x 3
bookshelf
high book
bookshelf
mega book
old book room bookshelf
Recovery pure water x2
barrel
Book x 6
bookshelf
mega book
bookshelf
high book
bookshelf
book
bookshelf
Mithril Backura
hidden room
spirit soul stone
hidden room
Recovery pure water x3
hidden room
monster
monster
Experience point
money
drop items
Human Liberation Army Swordsman
800EXP
800G
recovery pure water
Human Liberation Army Knight
910EXP
1100G
recovery pure water
Human Liberation Army Magician
820EXP
900G
Recovery pure water, Limana
Human Liberation Army Infantry
600EXP
400G
recovery pure water
Human Liberation Army Holy Knight
850EXP
1300G
recovery pure water
guardian gem
3100EXP
1800G
Mana
Fire and Ice Wisp
600EXP
10G
high heel hat, mana
earth breeze wisp
600EXP
10G
Mana
sludge gorgeous
2500EXP
5000G
spirit stone
Available Achievements
– Boheros defense battle begins… Defeat Human Liberation Army
– Defeat 8 units… Defeat 8 enemies
– Defeat Imperial Knights… Defeat Imperial Knight Roen
– Final result…? …End the battle with Kudan
/Discover the hidden room…Discover the hidden room.
Boss Knight Commander “Kudan”
After defeating the Knight Commander and inflicting a certain amount of damage, Kudan’s powerful technique will render
everyone unable to fight, then they will be fully recovered and the battle will end.
Chapter 3
The column of items that can be obtained shows the total number.
Mark 6
After defeating 3 monsters as instructed, press the switch on the H scene ” Brainwashing Soldier ” device after the event and
proceed to the next step while solving the trick. When you enter the room instructed by the boy, you will be in a battle with 3
guards.
If you leave the room after the event, you will learn the skill ” Machine Gun”.
Return to the healing room and go deeper into the east area, where he will fight with Despolica and others joining the party.
After the boss fight, talk to the woman in the northwest to get the ” Spirit Soul Stone “.
If you examine the gun in the showcase in the area with the public phone, you will learn the ” shotgun ” skill.
As you move forward, you will fight against 3 brainwashed soldiers. A boss battle will take place in the control room in the back.
item
Recovery water x6
Sakuraba×2
something like a crowbar
fragment of power
liberator
Machine gun bullets x 16
gun holder
heel mist
Sakuraba×2
inspirational mushroom
All-purpose mushroom
knight’s bracelet
spirit soul stone
laser claw
Shotgun bullets x 11
Shield barrier x2
recovery pure water
monster
monster
Experience point
money
drop items
lookout
400EXP
100G
recovery water
war machine
4500 EXP
2000G
machine gun bullets
talent drone
910EXP
600G
machine gun bullets
laser drone
750EXP
800G
recovery pure water
iron putt
500EXP
600G
Machine gun bullets, pure water recovery, rocket bullets
brainwashed soldier
1200EXP
13500G
Enhanced resuscitation drug
Available Achievements
/What am I doing? …You get it when you start Chapter 3
: What am I here for? …Defeat 3 monsters
/Encounter…Meet up with Despolica
/Weapon from another world…Learn the machine gun skill
/Defeat the Iron Doll…Defeat Diablo, the Iron Doll
/Suppress Mark 6…Defeat Diablo, the Iron Doll
Boss Diablo
House of Boheros
In order to aim for the emperor, she will next head to Ofe, the land of sacrifice.
When you go to the field map, a super beast will appear and you will be able to go to the Paro Mountains.
If you go to the Paro Mountains, you will get the achievement ” Master of the World”. If you’re just going there, it won’t be a
battle, so let’s get it.
Land of Sacrifice Ofe
You can see a sub-event with a mysterious man on the stone monument northwest of the entrance.
After watching the event with the super beast in the depths of the Sacrifice Mine, return to the city of the end.
When you head to the blind boy’s place, there will be an event with Diana.
Collect 3 weeds in the same area and return to cure the dehumanization phenomenon.
Later, FBI agent Diana joins them. After that, obtain the ” Watchtower Evacuation Exit Key ” from her uncle .
She returns to the current Ofe Street and enters the underground evacuation passage through the west door.
Talk to the man near the cannon in the east of the area where the special magician is located to get the “Spirit Soul Stone”.
If you check the showcase in the east area of the second floor of the watchtower, she will learn Diana’s skill “Energy Drink”.
If you go below the place where you learned the energy drink, she will be able to obtain the “Spirit Soul Stone”. (Only after
suppression?)

When you try to enter the guest room, Sarasa suggests you to go to the ceiling on the left.
After the event, there will be a battle with the Emperor.
If you win, your companions will leave, and when you re-enter the room, you and Diana will proceed together.
After that, head to the warehouse on the second floor and go to rescue your friends on the stage with a smoke screen.
Despolica will be fighting alone, so try to avoid the enemies as much as possible.
If you go inside, you’ll be in a battle with the Emperor.
The story will continue even if you lose this battle, but you will receive achievements if you win.
After that, you decided to head to the magical powerhouse Maximus.
item
tomato
mithril knife
Enhanced resuscitator x4
mithril knuckle
Recovery pure water x2
Limana x2
sapphire
mithril helm
heel mist
Sakuraba×3
All-purpose mushroom
Machine gun bullets x 20
Shotgun bullets x 14
piece of luck
Spirit stone x2
piece of law
shield necklace
hand gun
rocket bomb
crossbow
hidden items
item
place to check
item
place to check
Golden Wind
hole
spirit stone
hole
Fragment of reason
hole
spirit stone
hole
Recovery pure water x3
barrel
mithril armor
armor
Recovery pure water x3
barrel
monster
monster
Experience point
money
drop items
Ofe Garrison Soldier
1450EXP
1200G
recovery pure water
Maximus Expeditionary Soldier
1350EXP
900G
Limana
slave combatant
1000EXP
900G
recovery pure water
bunker
1500EXP
600G
Inspiration Mushroom, Spirit Stone, Stone Mace
training mimic
1400EXP
1000G
Enhanced resuscitator, machine gun bullets
Special class magician
7500 EXP
2400G
Mithril Rod, Rust Ring, Full Mana
Available Achievements
– Start conquering Orphe… Reach the land of sacrifice
– Get the weed! …Collect 3 weeds
/Defeat a special magician…Defeat a special magician
/Drink from another world…Investigate the showcase on the second floor of the watchtower
/Subjugate the emperor…? …defeat the emperor
/defeat the emperor…defeat the real emperor
/hidden item…break the pot under the energy drink showcase (only after conquering?)
/open shortcut…2nd floor right wall Open the shortcut at the end of the hidden passage in
Boss Emperor
Magic powerhouse Maximus
If you examine the magic device along the way, you will find an H scene called ” Exploitation ”.
If you examine the showcase at the bottom right of the middle floor, you will learn Diana’s skill ” Rocket Launcher ”.
You can get the ” Great Magic Prison West Key ” in the area to the right before descending to the lower floor.
Get it because you’ll need it to discover the hidden room.

In the underground dungeon, turn off the magic device along the way to stop the flames.
Go deeper and you’ll get to a boss battle.
After you win, unlock the door and proceed, and Lily Killer will temporarily accompany you.
When you go back the way you brought her and reach her upper level, an event will occur and you will be able to go to the
king’s room.
Enter the room and you’ll be in a battle with the King of Books.
item
Limana
Recovery pure water x 8
Fragment of reason
circlet
magic cloak
Spirit stone x2
Enhanced resuscitator x4
Mithril Backura
mithril rod
Shotgun bullets x 4
Magic Knight’s Shield
Machine gun bullets x 12
Sakuraba×3
Turned roots x 2
cane necklace
revolver
mega book
Golden Wind
Fragment of law x2
hidden items
item
place to check
item
place to check
Book x2
bookshelf
High book x 2
bookshelf
mega book
bookshelf
High book x 2
bookshelf
mega book
bookshelf
gigabook
bookshelf
high book
bookshelf
mega book
bookshelf
mega book
bookshelf
spirit staff
hidden passage
monster
monster
Experience point
money
drop items
Maximus Advanced Magician
2200 EXP
1800G
Limana, Stone Mace
Maximus Intermediate Magician
1600EXP
1400G
Limana
earth breeze wisp
600EXP
10G
Mana
magic worm
1500EXP
600G
none?
deadbone knight
1750EXP
1600G
Recovery pure water, Enhanced resuscitation potion
aged mimic
4000EXP
5000G
golden wind, spirit stone
maximus magic knight
1700EXP
1500G
none?
Special class magician
7500 EXP
2400G
Mithril Rod, Rust Ring, Full Mana
Available Achievements
: Where does the king go? …Arriving at the magical powerhouse Maximus
・VS Magic Knights…Arriving at the underground prison
・Victory against the Magic Knights Commander…Defeating the Magic Knights Commander
・Victory against the King of Books…Defeating the King of Books
・Conquering 3 times in a row…Defeating the King of Books
・Magic device off…Turns off the magic device at the end of the hidden passage.
・Otherworld weapon…Learn the rocket launcher skill.
・Hidden staff…In the hidden passage in the area before the boss battle with the Magic Knights Commander. Open the treasure
chest ahead
Boss Magic Knights Commander
Boss King of Books
During the battle, Sarasa learns the secret technique ” Prism Trism “.
House of Boheros
Leave the mansion and visit the bazaar, farmland, grand staircase, and castle library to see the events of your friends.
After seeing everything, we headed to Boheros National Farmland to watch a picnic event.
The next day, head to the castle to check on the commotion that occurred.
Everyone is compulsorily equipped with the Promise Insignia, so change it if necessary.
When you enter the castle, you will have two consecutive battles with the Mad Sahagin.
When you head to the hospital room, you’ll be in a battle with a crazy Radadaemon and a crazy Gilhound.
Afterwards, meet up with Lily Killer in the dungeon and exit the castle.
Head to the agreement park and head through the tunnel to the production site.
Underground waterway
This dungeon is a random encounter.
After defeating 10 demons in total, talk to Scathach in the northwest.
If you defeat 15, you will receive 5 Spirit Stones , and if you defeat 20, you will receive 2 Spirit Soul Stones .
Afterwards, talk to Gardemon in the back, then return to the mansion for a boss battle.
After defeating the boss, an important choice will occur.
“Throw away your promises”… Obtain the achievement ” Authentic History” and the game is over .
“Keep your promises” (appears over time)… Obtain the achievement ” Go on the wrong path of history ” and proceed.
item
Enhanced resuscitator x2
spirit soul stone
Rocket bullet x2
thunder mace
Shotgun bullets x3
ghillie armor
Recovery pure water x3
Mithril Backura
Machine gun bullets x 4
hidden items
item
place to check
mega book
bookshelf
monster
monster
Experience point
money
drop items
mad gill hound
0EXP
600G
Badge of Determination, Mega Book
Crazy Sahagin
0EXP
600G
Enhanced Revitalization Potion, Insignia of Determination, Mega Book
aged mimic
4000EXP
5000G
golden wind, spirit stone
Available Achievements
– Official History…Choose “Throw away promises” from the option
・Going on the wrong path of history…Choose “Keep your promises” from the option
Boss Madness Claura
Weak against lightning attributes, so attack with Sarasa’s Thunder Magna etc.
In front of the castle gate
Proceed south and you’ll encounter a battle with an assassin/spy. During the battle, Nardezita joins his companions.
If you go south, there will be another battle, and Remnant Mobius will join you.
There will be a battle with the assassin leader in the back.
Item
/Fragment of Law
Do Re Mi Fuckingdom
From Boheros Hall, head to Doremi Fuckingdom.
If you check the safe after the event, the H scene ” Close ” will play and the third chapter will end.
Chapter 4
Perpetual Neutral Country Kumin
Head to Kumin, a permanently neutral country.
When you talks to the super beast Fa, you learns ” Fa attraction “.
When you arrive, interrogate the three people in town and the man blocking your path will leave.
Head to the back alley from the northwest and Imperial Prince Narjejita will join your party.
Head to the Tower of Flash, and after a forced battle with the spy on the first floor, head for the top floor.
Since we will be proceeding without Despolica Lily Killer, let’s change our equipment and formation.
After getting the ” Flash Tower Key ” on the 3rd floor of the Flash Tower , open the cell on the 2nd floor and proceed.
Proceed forward and after the event with the assassin leader, switch to Lily Killer’s perspective.
Have a conversation with the magical creature in the back room.
If you select all the correct options, you can obtain the ” Spirit Soul Stone”.
If you look at Despolica’s memories in the birth celebration area, you will be returned to Diana’s perspective.
On the way, if you talk to the dying guard on the 5th floor, you will receive a ” Spirit Soul Stone “.
If you defeat the Metal Guardian on the 6th floor, you can obtain the “Flash Tower Secret Key”.
The back key of the Tower of Flash can also open warehouses that cannot be opened in the tourist district .
After getting the back key, check the showcase on the 4th floor and Diana will learn the ” Molotov cocktail ” skill.
When she reaches the top floor, she enters a boss battle, and after winning, she has an H scene ” first experience ” (loss of
virginity)
item
two handed sword
Spirit stone x2
Enhanced resuscitator x9
ring of numbness
Shotgun bullets x 11
rocket bomb
Tomato x 10
Daikon x6
sword necklace
shield necklace
Recovery pure water x2
recovery ultrapure water
double thunder sword
old crown
amethyst
non-toxic ring
tiara
Rocket bullet x2
Machine gun bullets x5
hidden items
item
place to check
item
place to check
Enhanced resuscitator x2
barrel
Book x 10
bookshelf
Mega book x2
bookshelf
Recovery pure water x2
barrel
monster
monster
Experience point
money
drop items
spy
2100EXP
2050G
Assassin’s Dagger
assassin
1900EXP
1950G
Fruit of Antidote, Assassin’s Dagger
assault gray
1700EXP
800G
none?
Descor
1350EXP
500G
Rikka
Fire and Ice Wisp
600EXP
10G
high heel hat, mana
earth breeze wisp
600EXP
10G
Mana
metal guardian
9000EXP
500G
spirit stone
Available Achievements
: A clue to the darkness… Reaching the eternally neutral country of Kumin
– Obtaining the key to the Tower of Flash… Obtaining the key to the Tower of Flash.
・Obtain the back key to the Tower of Flash…Obtain the back key to the Tower of Flash.
– Weapons from another world… Examine the showcase on the 4th floor
– Defeat the assassination squad leader… Defeat the assassination leader
– End of healthy education… Watch the H scene “First Experience”
– Control Cumin… Obtained at the event with Ange.
・Time Capsule…Open the old treasure chest on the first floor of the Flash Tower after Lily Killer becomes your friend.
Boss Assassination Leader
House of Boheros
After heading to Boheros Castle, head to the cliff beyond the farmland.
After the event with Ange, head to the throne room of the royal castle and you will be able to go to the “Third Empire ”.
*Sub-event*
: Sarasa Rescue Event
When you enter the magical creature research area, an event will occur where Sarasa gets separated.
If you can’t rescue Sarasa within 3 minutes, an H scene ” Sarasa rescue failure ” will occur (loss of virginity)
Sarasa’s location is in the recovery point room at the back .
If you successfully rescue her, she will receive ” Spirit Stone x5 “.
・Diana Rescue Event
When you enter the transport corridor, an event will occur where Diana gets separated.
If Diana cannot be rescued within 3 minutes, an H scene ” Failure to rescue Diana ” will occur (loss of virginity)
Diana’s location is in the control room at the bottom.
Compared to her other companions, she has less time to spare, so try to avoid battles with her enemies as much as possible.
If she succeeds in rescuing her, she will receive ” Spirit Stone x5 “.
・Najejita Rescue Event
When you enter the Great Magic Prison, an event will occur where Najejita gets separated.
If you can’t rescue her within 3 minutes, an H-scene ” Nadjejita rescue failure ” will occur .
Nadjejita’s location is inside the prison on the northwest side of the east floor .
If the rescue is successful, you will receive ” Spirit Stone x5 “.
・EX Dungeon Underground Classroom
When you enter the magic barrier Rukuruk, there will be an event with a delinquent girl. You can now go to the EX Dungeon
basement classroom
by passing through the underground passage from the schoolyard door .
・EX Dungeon Brainwashed Soldier Area
As you proceed beyond the west ward, a conversation event with John will occur.
After that, you can go to the EX dungeon brainwashed soldier area from the healing room.
EX Dungeon “Monkey Kingdom”
If you talk to the local man in the private house at the entrance, you will receive information about a drug that will make you
naked.
After that, if you enter the blue building Fairy Costume in Doremi Fuckingdom, you can exchange 7 dragon things and a drug
that will make you naked. (It costs a lot of money, but you can exchange it for coins.)
If you return to the man’s house with the medicine, you can always fight in a back attack state when fighting enemies.
It is possible to proceed without completing this event.
If you go deeper into the hot spring area, you will be faced with a boss battle with the King Monkey.
It is weak to fire attributes, so attack it with Flame Gladius, Fire Magna, etc.
After you win, you can go to the hot springs by talking to the king monkey, and you can also have a rematch by training.
Location of the Dragon’s Are
: Boheros Bazaar… Can be purchased from a merchant for 49999G
– Old Singana Fort… The woman north of the door that requires the bat key
– Downstream of the Dragon Falls… Talk to the man on the edge of the cliff
– Chinese medicine from the Prana Trading Country Purchased from a merchant for 10,000G
– Mark 6…Talk to the man at the end of the transport device
– Kumin Tourist Town… Talk to the man in the warehouse that can be accessed with the back key of the Tower of Flash
– City of the End of Ofe… Talk to the slave
– Paro Mountains …Dropped with a certain probability when defeating Paro Dragon.
item
spirit stone
Scroll of Return x2
Enhanced resuscitator x3
double thunder sword
jewel helm
Liberation Sword Yagrush
hidden items
item
place to check
item
place to check
piece of law
jar
spirit soul stone
jar
monster
monster
Experience point
money
drop items
Yaldapa electric monkey
3500 EXP
600G
Antidote Fruit, Spirit Stone, Rust Ring
Yaldapa fire monkey
3300EXP
600G
Inspiration Mushroom, Spirit Stone
Yaldapa Ice Monkey
3400EXP
600G
moon grass, spirit stone
Available Achievements
– Start conquering the Monkey Kingdom… Arriving at the Monkey Kingdom
– Thank you… Get the dragon thing in Kumin Tourist Town
– Defeat the King Monkey… Defeat the King Monkey
– Secret Hot Spring Sword… Liberation Sword Yagrush Obtain
/Conquer the Monkey Kingdom…Defeat the Monkey King and exit to the field map.
Third Empire
If you head to the throne in the royal castle, all your equipment will be confiscated after the event.
Examine the painting and press the button to proceed from the ladder that appears.
The strangely heavy dagger hanging on the wall along the way is an item that will make a staircase appear if you check the
lower right corner when escaping from that room. A treasure chest with a password can be opened by entering ” 7730 “.
If you talk to the vain rich man along the way, you will receive a ” Spirit Soul Stone “.
Proceed to Battle Stage 2 and you will be in a battle with the Red-Eyed Knight.
You can recover your equipment by going down the fork in the road ahead, so change your equipment before heading to the
audience room.
Head to the throne room for a boss battle.
After victory, the battle with the Eternal Doll ends after a turn.
item
Rocket bullet x3
Rikka×3
Sakuraba×13
skewer
frying pan
Inspiration mushroom x2
bronze spear
bronze buckler
rocket mace
Enhanced resuscitator x8
jewel helm
prepared dress
Recovery pure water x 7
recovery ultrapure water
Spirit stone x4
Bronze armor x2
dragon armor
dragon helm
strangely heavy dagger
mithril sword
bronze plate
bronze armor
Mithril Backla x2
bronze helm
All-purpose mushroom
battle stage key
mithril sword
genuine leather whip
radical underwear
Moon grass x2
Turned roots x 2
mithril rod
tiara
Shotgun bullets x5
hidden items
item
place to check
item
place to check
Spirit stone x2
barrel
muddy ring
barrel
recovery pure water
barrel
mushroom head
underground food storage
fragment of power
jar
kill rifle
behind the battle stage
emergency dagger
hidden passage
ultimate scroll
pass treasure chest
monster
monster
Experience point
money
drop items
Derro
400EXP
10G
Sakuraba, pointed fangs
red eye infantry
2400EXP
0G
bronze helm
red-eyed swordsman
2500EXP
0G
bronze spear
red eye magician
2600 EXP
0G
none?
spy
2100EXP
2050G
Assassin’s Dagger
Descor
1350EXP
500G
Rikka
Jinoo
200EXP
50G
Poison fang
Jinoush
1800EXP
500G
Poison fang
Available Achievements
– Slave Prince’s Counterattack… Reach the Throne
– Return Equipment… Recover Stolen Equipment
– Dark Gun… Get the Kill Rifle Behind the Wall in the Battle Stage
– Hidden Weapon… Hidden Assassin Examine the shelf at the end of the secret passage in the room.
Boss next emperor
Sacred place Persias
After finishing talking with your friends in town, return to the inn.
After the event, head northeast of the temple and enter the temple.
As you go deeper, you will be dropped into an underground temple by a trap, and an escape event will begin.
In the battle with the killer Lily Killer, your companions will panic and their status will drop, but it is possible to defeat them
normally.
There is a hidden passage in the room of admonition, and by examining the showcase beyond that, she learns Diana’s “ Heavy
Machine Gun ” and Nardezita’s ” Machine Gun”.
A treasure chest with a password can be opened by entering ” 8511 “.
Procedure
①Obtain the “Key of Admonition” from Hannah hidden in the basement shelf.
②Open the northwest door of the Corridor of Rebirth and look at the magic device inside to get the H scene “Dark Record 1”
and “Training Key”.
③Open the door in the northeast of the Corridor of Rebirth, and get the “Key to the Training Model” through the middle door
on the right.
④Open the prison at the bottom right door and look at the magic device to get the H scene “Dark Record Part 2” and “Eternal
Key”
⑤Open the door at the back of the Eternal Path in the basement and obtain the “Eternal Model Key”
⑥Look at the magic device beyond the prison in the southwest of the same room.
item
silk robe
Enhanced resuscitator x8
Spirit stone x2
Grand Armor x2
Machine gun bullets x 27
Shotgun bullets x6
sword necklace
Flamberge
Assassin’s Dagger
hidden items
item
place to check
item
place to check
heel mist
barrel
piece of law
jar
Fragment of reason
jar
Fragment of luck x2
jar
Gigabook x 2
bookshelf
Book x 3
bookshelf
Vorpal Dagger
hidden passage
ultimate scroll
pass treasure chest
monster
monster
Experience point
money
drop items
something
999EXP
444G
none?
Murderer Lily Killer
4444EXP
0G
none?
Available Achievements
– Begin conquering Persias… Reach the holy land of Parsias
– Weapons from another world! Two things… Investigate the showcase at the end of the hidden passage
. Hidden weapon… Investigate the corpse at the end of the hidden passage of Eternal Training.
A very old and nostalgic memory ~ Conquest of Versius
An event where you will see Lily Killer’s memories after completing the event in the underground temple.
You decided to explore the village by controlling the forest fairy.
After talking to all the friends scattered around the village and finishing the search, head for the exit.
Even if the 10 minute time limit is reached, the event will continue without a game over.
After the event, there will be a battle with a white monster.
This battle is a losing event, so it doesn’t matter if you lose.
After that, you will control the Apostle Despolica and fight against the Eternal Doll.
item
Heel mist x 8
crystal tiara
Spirit stone x2
monster
monster
Experience point
money
drop items
old knight
0EXP
0G
Heal mist, spirit stone
Available Achievements
: Conquer Persias… Defeat the Sage of Wisdom
House of Boheros
When you enter the mansion, Millennium Princess Lily Killer will join you.
She heads to the throne of the royal castle and finishes the conversation event with Tordeira, then heads to the Third Empire
again.
After leaving the throne, you can use the item ” Flower Poem ” to turn Despolica into apostle mode.
Her abilities will increase and she will be able to use usage skills, but she will be unable to use magic skills, so use them
depending on the situation.
*Sub-event* Destroy the BADEND!
If you go to the Sage of Wisdom in the temple, you will be able to go to the underground temple.
Once you enter, you will be chased by monsters called beasts, just like in the story, and aim for a room called the Seal of
Admonition.
(Underground Temple Steps)
① “Key of Training” in Eternal Training
② “Key of Model of Training” in Agony of Training
③ “Key of Precept” in Model of Training
④ Operate the hidden switch with the stamp of Precept
If you operate the hidden switch and move forward, you will be able to go to the IMASHIME prison.
After defeating the beast/guard, defeat the swell in the back to clear it.
Obtain the achievement ” BADEND Disappearance”.
If you control them, you can destroy BADEND mode, you will no longer be able to use the surrender room, and you will not be
able to enter BADEND mode even if you are defeated.
Available Achievements
: Completed rescuing a friend…Lily Killer joins your team
/Nightmare again…Destroy the BADEND!
Enter the underground temple and BADEND disappears… Destroy BADEND! clear
Third empire
After watching the event in front of the castle, head to the castle waterway by boat.
Be careful, if you defeat the small fry monster Sludge, it will call the powerful monster Mictlan as reinforcements.
If you defeat 6 groups of monsters and report them to the Imperial Knight, you will receive ” Spirit Stone x5 ”.
Head to the back of the waterway and head to the back stage for a boss battle.
item
Inspiration mushroom x7
Matsukaze mushroom
full mana
shaman mace
All-purpose mushroom x6
dark arrow
Limana
gigabook
Enhanced resuscitation drug
diamond
monster
monster
Experience point
money
drop items
dive bunker
3150EXP
1800G
moon grass, spirit stone, limana
Mictlan
9900EXP
4500G
spirit stone
Descor
1350EXP
500G
Rikka
Available Achievements
: Cleaning the underground waterway…Defeat the 6th group of monsters and talk to the Imperial Knights
– Finalization of the battle for succession to the throne… Defeat Drubeja
– Conquer the Third Reich… Defeat Drubeja
Boss Dolbeja
House of Boheros
If you head for the decisive battle with the Emperor, you won’t be able to proceed with sub-events, so if there’s anything you
want to do, do it now.
Second empire
Climb up to the upper floor and get the ” Imperial Castle Key ” from the treasure chest beyond the grave marker SC, and you will
be able to open the key.
Proceed beyond the audience waiting room to a boss battle.
After that, the event battle will end after a few turns.
item
Turned roots x 2
imperial cloak
Machine gun bullets x 12
golden wind x2
full mana
Shotgun bullets x8
Rocket bullet x 4
princess dress
Silk robe x2
Recovery pure water x3
Imperial cloak x3
Tsuba
Enhanced resuscitator x2
Gigabook x 2
Book x 10
key to the imperial castle
chain mail
bronze shield
bronze sword
bronze helm
grand armor
hidden items
item
place to check
item
place to check
fragment of power
jar
Fragment of Mamoru
jar
Recovery pure water x 4
barrel
monster
monster
Experience point
money
drop items
Grave marker AC
3500 EXP
0G
none
Grave marker BA
???EXP
0G
none
Grave marker BB
???EXP
0G
none
Grave marker BC
???EXP
0G
none
Mictlan
9900EXP
4500G
spirit stone
Grave marker SC
0EXP
5000G
claymore, gigabook
Available Achievements
– Start of the Second Empire Battle… Reach the Second Empire
– End of the War… End the event battle after defeating the Emperor
Boss Emperor
Boheros ~ Prana Trading Country
Diana and Nadezhita decide to act together.
They head to the small country of Tortoise to pursue the Potion King.
Talk to the drunk man at the inn in Tortoise Country and head to Prana Trading Country.
Head to the inn in Prana Trading Country and sneak into the luxury hotel through the window.
After finishing the battle in the 3F hall, Kalinka will learn ” Full Heal”. Battle against the criminal leader in the 7F hall.
After that, if you go to the back, you will be automatically moved to the H scene ” Regret ” Imperial Palace Outer Garden, and
Kudan will temporarily accompany you after the event in the back after passing through the sewers.
item
Fragment of protection (vase)
Rocket bullet x2
Machine gun bullets x 18
Shotgun bullets x3
Fragment of reason (pot)
Enhanced resuscitation drug
monster
monster
Experience point
money
drop items
criminal
1900EXP
1950G
Shotgun bullets, machine gun bullets, recovery pure water
sludgebone
390EXP
10G
Bone, Sludge Dagger, Puyo Puyo
Mictlan
9900EXP
4500G
spirit stone
Available Achievements
: Broken threads from another world… Automatically obtained at events
Third Reich/Potion Factory
Proceed to the end of the narrow alley in the center and enter the magic potion factory.
If you go to the back, Kudan will leave and you will have a boss battle.
After the H scene ” Doujin “, operate Despolica and follow the instructions of the plants to end Chapter 4.
item
Shotgun bullets x7
Sakuraba×3
Machine gun bullets x 4
Rocket bullet x 4
golden wind x2
Recovery ultrapure water x2
Inspiration mushroom x2
hidden items
item
place to check
item
place to check
Recovery pure water x3
jar
fragment of power
jar
fragment of life
jar
monster
monster
Experience point
money
drop items
criminal
1900EXP
1950G
Shotgun bullets, machine gun bullets, recovery pure water
Available Achievements
: Spun into another world…defeat Diablo
Boss Diablo
Diana’s accuracy is significantly reduced at the start of the battle.
After dealing a certain amount of damage, Diana will be able to use the prototype gun ” Lost Innocent “.
Chapter 5
Imperial palace
Go north and watch the magic barrier event, then head to the roof of the watchtower.
When you enter the Imperial Palace, there is an event with Kudan.
After that, head to the throne and you will have a battle with 3x defense forces.
After the victory, the remnant Mobius heads to the castle tower where Kudan is waiting in search of the Hero’s Shield.
He can change his equipment by talking to Mobius, so do that in advance.
Despolica and her friends head west toward the Reverse World Tree.
If you talk to the imperial knight who has no intention of fighting in the back of the inner palace, you will receive a ” Spirit Soul
Stone “.
item
Recovery ultrapure water x2
Mithril Shield x2
Golden Wind
Force shield x2
Crystal armor x2
Revival medicine x2
wing necklace
Crystal helm x2
full mana
Enhanced resuscitation drug
hidden items
item
place to check
item
place to check
Recovery pure water x3
barrel
Revival medicine x3
barrel
Recovery pure water x2
barrel
recovery ultrapure water
barrel
recovery pure water
barrel
recovery ultrapure water
barrel
Hinoki stick/50G
Behind the throne
monster
monster
Experience point
money
drop items
defense force
4100 EXP
7500G
recovery pure water
Aubade Heavy Warrior
7500 EXP
9000G
machine gun bullets, shotgun bullets
Grave marker AC
3500 EXP
0G
none?
Grave marker BA
???EXP
0G
none?
Grave marker BB
???EXP
0G
none?
Grave marker BC
???EXP
0G
none?
Grave marker SC
0EXP
5000G
claymore, gigabook
slave suicide soldier
3300EXP
0G
none?
white grave marker
6800EXP
0G
none?
compensation
0EXP
0G
mega book
Available Achievements
-Start of the final battle…obtained at the start of Chapter 5
-Dark Garb…Open the treasure chest at the end of the hidden passage to the right of the throne
-Defeat the King of the Sewers…Defeat Sludge Megaton at the end of the hidden passage in the sewers
Reverse world tree
After meeting up with Nadjejita and Diana, head towards the depths of the Reverse World Tree.
As we move beyond the singularity, we move on to the residual Mobius operation.
Once you defeat the boss in the back, the battle will begin from Despolica’s perspective.
item
Rokka×8
All-purpose mushroom x2
Moon grass x5
All-purpose mushroom x2
Turned roots x 12
full mana
Fragment of life (after defeating a strong enemy)
Soul Fragment (after defeating a strong enemy)
hidden items
item
place to check
item
place to check
fragment of power
jar
Fragment of Mamoru
jar
piece of law
jar
piece of speed
jar
piece of luck
jar
monster
monster
Experience point
money
drop items
white grave marker
6800EXP
0G
none?
compensation
0EXP
0G
mega book
Available Achievements
– Clothes of Light… Open the treasure chest in the hidden room of the Reverse World Tree
– Defeat the World Tree’s bud… Defeat the World Tree’s bud
– Defeat the unparalleled samurai… Defeat Kudan
– Defeat the Curse of Blessing… Defeat Breathcurse Defeat
/Achieve world domination… Defeat Breskarth
Boss Kudan
It becomes stable if you fight while maintaining the physical counter state with the Akatsuki skill.
The counter chance is 50%, so don’t neglect recovery.
It is recommended that you take precautions against lightning by equipping yourself with a lightning rod helm.
After dealing a certain amount of damage, you will be able to control two people using the power of fusion and separation.
Boss Breath Curse
The enemy’s form changes every time you deal a certain amount of damage.
Many of the enemy’s attacks are powerful, so using Ange’s skills to attract attacks will make it easier to fight.
“Stupid Sword” is an all-out attack that even Ange’s skills cannot attract, so don’t forget to recover.
It is recommended to have Diana in your party, as she will periodically grant you a blessing status .
Last chapter
Escape from the assassin savior.
Proceed forward to a battle with the Black Tombstone (King Singana).
If you win, the item menu will no longer be available .
As you go deeper, you will be in a battle with the Black Tombstone (King of Books).
Lily Killer will join during the battle.
After victory, you will have a final battle with the Savior.
Since recovery items cannot be used, you will have to fight only with skills and magic.
We recommend replenishing TP with Cannibalus Plants and scraping with Bloody Rose.
If your MP is low, use Mei’s Dew to recover it.
Even if you become unable to fight, the spirit stone in your pocket will restore you once.
If you win, you will enter the ending and get the achievement ” DemonsRoots Cleared “.
After Clearing
After clearing the game, the following five benefits will be unlocked.
① Transfer play
By loading the data after clearing the game, transfer play becomes possible.
Most things such as equipment, items, and levels can be inherited.
② You can now skip the monologue and epilogue
. You can now skip the beginning of the game and before the ending.
③ Release the warehouse in Boheros Hall
Enter the warehouse from the opposite direction of the hot spring in Boheros Hall.
In addition to healing ultra-pure water, there is a mirror inside, and if you examine it, you can play Another Episode.
④You will be able to change your clothes
You will be able to buy dress-up costumes from Fairy Costumes in Doremi Kingdom.
⑤Author’s comment:
Houses that cannot be opened in the EX dungeon “Monkey Kingdom”
can now be opened during takeover play.
Inside, you can listen to the story of the creator.
Another Episode
Examining the mirror in the Forgotten Warehouse in the Hall of Boheros will take you to the Illusionary Place of Prayer,
allowing you to play Another Episode.
As you head towards Boheros Castle, you will encounter a battle with Queen Mukoku along the way.
After winning, head to the throne of Boheros Castle and you’ll be in a battle with the command towers.
Afterwards, you can fight the king on the other side of the throne.
This is the strongest enemy in this game, so be prepared.
Items
: Recovery pure water x 2 (corpse)
, Spirit stone x 2 (corpse)
, Recovery pure water x 2 (corpse)
, Spirit stone x 2 (corpse)
Available Achievements
/Phantom Battle
/Settlement
/True Settlement
H scene list/conditions
H scene
conditions
once upon a time
Automatically occurs in the prologue
distant past
Automatically occurs in the prologue
battle of the losers
Automatically occurs in the prologue
captive murderer
Automatically occurs in chapter 1
A moment of healing
Automatically occurs in chapter 1
Another world chase
Automatically occurs in chapter 3
promise
Occurs in Chapter 3 choices
history’s misfortune
Occurs in Chapter 3 choices
Does not prevent launch
Automatically occurs in Chapter 4
bond of mutual forgiveness
Automatically occurs in Chapter 4
loneliness
Automatically occurs in Chapter 4
old friendship
Automatically occurs in Chapter 4
BLOSSOM
Automatically occurs in Chapter 4
Unprecedented
Automatically occurs in Chapter 4
Diana Fagerson
Automatically occurs in Chapter 4
slave army and imperial army
Automatically occurs in chapter 5
The path the light points to
Automatically occurs in chapter 5
the legend sleeps
Automatically occurs in the final chapter
Demon Roots
Automatically occurs in the final chapter
Thanks For Playing
See the ending
baptism of slaves
Automatically occurs in chapter 1
slave labor
Automatically occurs in chapter 2
slave market
Automatically occurs in chapter 2
slave education
Automatically occurs in chapter 2
brainwashed soldier
Automatically occurs in chapter 3
exploitation
Automatically occurs in chapter 3
close
Automatically occurs in chapter 3
First experience
Automatically occurs in Chapter 4
Dark record part 1
Automatically occurs in Chapter 4
Dark record part 2
Automatically occurs in Chapter 4
Bibanon
Enter Yukimi Onsen after clearing the EX Dungeon Monkey Kingdom.
regret
Automatically occurs in Chapter 4
sharing the bed
Automatically occurs in Chapter 4
First Doremi Kingdom
Enter Doremi Kingdom for the first time
Footjob R
Spin the gacha at Queen Castle
Footjob SR
Spin the gacha at Queen Castle
Footjob SSR
Spin the gacha at Queen Castle
Ange’s first experience
Enter the first experience area of Doremi Kingdom
Irregular cowgirl R
Spin the gacha at Queen Castle after losing your virginity
Irregular cowgirl SR
Spin the gacha at Queen Castle after losing your virginity
Irregular cowgirl SSR
Spin the gacha at Queen Castle after losing your virginity
Ange’s first experience
Nominate Ange in Top of Cherry
Ange rescue failure
Fail the rescue event that occurs in Singana Forest after Chapter 2.
Titty fuck R
Spin the gacha on the Ferris wheel
Titty fuck SR
Spin the gacha on the Ferris wheel
Titty fuck SSR
Spin the gacha on the Ferris wheel
Missionary R
Spin the gacha on the Ferris wheel after losing your virginity
Missionary SR
Spin the gacha on the Ferris wheel after losing your virginity
Missionary SSR
Spin the gacha on the Ferris wheel after losing your virginity
First experience with Kalinka
Nominate Kalinka in Top of Cherry
Kalinka rescue failure
Failed in the rescue event that occurs in the jungle area after Chapter 2.
Handjob R
Spin the gacha on Amazon Road
Handjob SR
Spin the gacha on Amazon Road
Handjob SSR
Spin the gacha on Amazon Road
Strangle R
Spin the gacha on Amazon Road after losing your virginity
Neck SR
Spin the gacha on Amazon Road after losing your virginity
Choking SSR
Spin the gacha on Amazon Road after losing your virginity
First experience of Sarasa
Nominate Sarasa in Top of Cherry
Sarasa rescue failure
Failed in the rescue event that occurs in the magical creature research area after
Chapter 3.
Patience Karaoke R
Spin the gacha on the magical stage
Patience Karaoke SR
Spin the gacha on the magical stage
Patience Karaoke SSR
Spin the gacha on the magical stage
Climax show R
Spin the gacha on the magical stage after losing your virginity
Climax show SR
Spin the gacha on the magical stage after losing your virginity
Climax show SSR
Spin the gacha on the magical stage after losing your virginity
Diana’s first experience
Nominate Diana in Top of Cherry
Diana rescue failed
Failing the rescue event that occurs in the transport corridor after Chapter 3
Water torture R
Spin the gacha at Under Factory
Water torture SR
Spin the gacha at Under Factory
Water torture SSR
Spin the gacha at Under Factory
Wall edge R
Spin the gacha at Under Factory after losing your virginity
wall SR
Spin the gacha at Under Factory after losing your virginity
Wall edge SSR
Spin the gacha at Under Factory after losing your virginity
First experience with Nage
Nominate Nadezhita in Top of Cherry
Narje rescue failure
Failed in the rescue event that occurs in the Great Magic Prison after Chapter 3.
3PR
Spin the gacha in Crazy Mansion
3PSR
Spin the gacha in Crazy Mansion
3PSSR
Spin the gacha in Crazy Mansion
6PR
Spin the gacha at Crazy Mansion after the first experience
6PSR
Spin the gacha at Crazy Mansion after the first experience
6PSSR
Spin the gacha at Crazy Mansion after the first experience
School gate R
Spin the gacha in Final School
SR in front of the school gate
Spin the gacha in Final School
SSR in front of the school gate
Spin the gacha in Final School
Classroom R
Spin the gacha in Final School
Classroom SR
Spin the gacha in Final School
Classroom SSR
Spin the gacha in Final School
baptism of prisoners
Enter BADEND mode
Declaration of ultimate defeat
Defeat by writing Despolica’s name in the execution dungeon.
battlefield comfort order
Defeat by writing Ange’s name in the execution dungeon.
spectacle trampling
Defeat by writing Kalinka’s name in the execution dungeon.
Installed meat urinal
Defeat by writing Sarasa’s name in the execution dungeon.
Undercover investigation into hell
Defeat by writing Diana’s name in the execution dungeon.
Completely feminine boy
Defeat by writing Nadezhita’s name in the execution dungeon.
Surrounding despair
Defeat Lily Killer by writing her name in the execution dungeon.
Command: Pissing
Examine the red crystal in the execution dungeon
Instruction: Breast masturbation
Examine the red crystal in the execution dungeon
Command: Magic suction stick
Examine the red crystal in the execution dungeon
Order: whipping
Examine the red crystal in the execution dungeon
Instruction: Squat
Examine the red crystal in the execution dungeon
Instruction: Creampie begging
Examine the red crystal in the execution dungeon
Order: Super beast mating
Examine the red crystal in the execution dungeon
Instruction: guinea pig
Examine the red crystal in the execution dungeon
Instruction: Belly bread
Examine the red crystal in the execution dungeon
Order: Kabejiri
Examine the red crystal in the execution dungeon
Order: chestnut box
Examine the red crystal in the execution dungeon
Order: Hidden
Examine the red crystal in the execution dungeon
Command: stop
Examine the red crystal in the execution dungeon
Order: W Kabebutri
Examine the red crystal in the execution dungeon
Instruction: Chin box
Examine the red crystal in the execution dungeon
Instructions: simulated sex
Examine the red crystal in the execution dungeon
Instruction: Dildo exchange
Examine the red crystal in the execution dungeon
Instruction: Pearl birth
Examine the red crystal in the execution dungeon
Instruction: Begging for a large amount of
creampie
Examine the red crystal in the execution dungeon
Order: Brainwashing Battle
Examine the red crystal in the execution dungeon
manners of a loser
Talk to King Singana on the left side of Imashime’s prison.
Excretion management
Talk to the man on the left in the center of the prison where Kalinka became a
friend.
ejaculation management
Talk to the man at the bottom left of the Imashime prison after Nadjejita became
your friend.
Achievement list/conditions
number Achievements
Conditions of acquisition
1
here we go! Let’s go quickly!
Obtained automatically in the prologue
2
Welcome to DemonsRoots
Obtained automatically in the prologue
3
Conquer the Boheros Kingdom!
Conquer the Kingdom of Boheros
4
Mazoku Metsubou!
Wipe out all enemies at the Boheros Centennial Festival
5
Kishidanchogoroshi!
Defeat a proud adult
6
Get the treasure! (Nimanima
Obtain Topaz at the Festival
7
Get the treasure! (Surisuri
buy a helmet at a festival
8
items in the forest
Open the treasure chest in the hidden passageway in the forest
9
Tortoise strategy begins
Reach Tortoise Dungeon
10
Encounter with a murderer
Meeting Lily Killer for the first time
11
secret room released
Find the secret room in Tortoise Dungeon
12
Conquer the small country of Tortoise
Conquer the small country of Tortoise
13
Sludge underground cave strategy
Clear EX Dungeon Sludge Underground Cavern
14
Defeat the white
Defeat the whiteout
15
Defeating magical creatures
Defeat a powerful synthetic magical creature
16
hidden assets
Open the treasure chest at the end of the hidden passage
17
Start conquering Singana
Reach Singana
18
hidden fort room
Discover the hidden room in the Singana Old Fort
19
anonymous hero
Obtained automatically in the first chapter
20
Singana brutal countries conquered!
Conquer the Singana savage nations
21
Extremist hideout capture
Clear EX Dungeon Extremist Hideout
22
Defeat Gladiator
Defeat the gladiator girl
23
Defeat King Singana
Defeat King Singana
24
gem of the cave
Obtain the sapphire in Singana’s Cave
25
Prana strategy begins
Reach Prana Trading Country
26
Avoid rip-offs
Talk to the old merchant woman south of town.
27
Saint Colosseum starts
Participate in Saint Coliseum
28
Domination of the commercial nation of
Prana
Defeat King Prana
29
Hot water vein strategy
Clear EX dungeon underground hot spring
30
Defeat the big bird
Defeat Roxik
31
Defeat macho gorilla
Defeat the macho gorilla
32
Defeat King Prana
Defeat King Prana
33
gladiator’s will
Open the treasure chest containing 50 Poison Fang in the basement.
34
Salvation bath completed
Create a hot spring after clearing the EX dungeon underground hot spring
35
Torkia capture begins
Reach the Turkia Kingdom
36
Queen rescue operation
Climb the ivy on the outer wall of Torchia Castle
37
Conquer Torkia
Defeat King Torkia
38
Defeat the white
Defeat the white outline
39
Defeat King Torkia
Defeat King Torkia
40
First dragon defeat
defeat the dragon
41
Defeat Fafnir
Defeat the powerful enemy Fafnir
42
Items hidden in the waterfall
Open the treasure chest at the end of the hidden passage in the Great
Waterfall of Destiny.
43
Not a strategy!
exit monster house
44
wall people’s home
Reach the magic barrier Rukuruk
45
pathetic miniature garden
Defeat the student/seiki committee member
46
Guiding students with body language
Clear the EX Dungeon Underground Classroom
47
Defeat the magic devices
Defeat the magic devices
48
plant magical creatures
Defeat a powerful plant magical creature
49
hidden key
Obtain the key to Ward 263
50
hidden save
Discover the hidden passage in the innermost part of the student dormitory
(before the boss battle)
51
Boheros defense battle begins
Defeat the Human Liberation Army
52
Defeated 8 units
Defeat 8 enemies
53
Defeat Imperial Knight
Defeat Imperial Knight Roen
54
Settlement…?
Finish the battle with Kudan
55
Hidden room discovered
Find the hidden room near where you fought Imperial Knight Roen.
56
master of the world
Enter the Paro Mountains where the super beasts that appear after Chapter 3
57
miraculous victory
Defeat Super Beast Gon
58
what am i doing?
Obtained when starting Chapter 3
59
What am I here for?
Defeat 3 monsters
60
Encounter
Meet up with Despoluca
61
Mark 6 conquered
Diablo, defeat the iron doll
62
Suppression of brainwashed soldiers
Clear the EX dungeon brainwashed soldier area
63
Weapons from another world
Learn machine gun skills
64
Start conquering Orfe
Arriving at Ofe, the land of sacrifice
65
Get the weeds!
Collect 3 weeds
66
Shortcut opened
Open the shortcut to the Ofe Watchtower
67
Subjugating the Emperor…?
defeat the emperor
68
Victory over the emperor!
Defeat the True Emperor in Chapter 3’s story
69
Defeat special magician
Defeat the special magician
70
otherworldly drink
Examine the showcase on the second floor of the watchtower.
71
hidden items
Head to the place where the bell was ringing on the second floor of the
watchtower.
72
Where is the king?
Reach the magical powerhouse Maximus
73
VS Magic Knights
reach the underground dungeon
74
magic device off
Investigate the magic device behind the hidden door in the underground
dungeon.
75
3 consecutive conquests
Defeat the King of Books
76
Defeat the Magic Knights Commander
Defeat the Magic Knights Commander
77
Defeat the King of Books
Defeat the King of Books
78
hidden wand
Open the treasure chest at the end of the hidden passage in the area before
the Great Magic Prison boss battle.
79
Weapons from another world
Examine the showcase at the bottom right of Maximus’ middle floor.
80
Going down the path of history
Select “Keep your promise” from the options
81
official history
Select “Throw away promises” from the options.
82
clues of darkness
Reach Kumin, a permanently neutral country.
83
The end of healthy education
Watch the H scene “First Experience”
84
cumin control
Obtained at an event with Ange
85
Defeat the assassination squad leader
Defeat the assassin leader
86
Obtain the key to the Tower of Light
Obtain the key to the Tower of Light
87
Obtain the secret key to the Tower of
Flash
Obtain the secret key to the Tower of Flash
88
Thank you
Obtain the dragon item at Cumin Tourist Town.
89
Weapons from another world
Examine the showcase on the 4th floor of the Flash Tower.
90
Slave Prince’s Counterattack
reach the throne
91
Conquest of the Third Reich
Defeat Drubeja
92
The battle for succession to the throne
comes to an end
Defeat Drubeja
93
Underground waterway cleaning
Defeat Class 6 monsters and talk to the Imperial Knight
94
He was the one who touched the shark.
Defeat the powerful shark
95
Equipment return
Recover stolen equipment
96
hidden weapon
A hidden room in the Royal Castle of the Third Empire. Examine the shelf at
the end of the hidden passage in the lower wall.
97
dark gun
Obtain the kill rifle behind the wall in the 3rd Empire Battle Stage
98
Start conquering Persias
Arriving at the sacred place Persias
99
Conquest of Persias
Defeat the Sage of Knowledge
100
Friend rescue completed
Lily Killer joins
101
Nightmare again
Destroy BADEND! Enter the underground temple with
102
BADEND disappears
Destroy BADEND! clear
103
hidden weapon
Investigate the corpse at the end of the hidden passage in Eternal Training
104
Weapons from another world! Two
Examine the showcase at the end of the hidden passage in the room of
admonition in the underground temple of Persias.
105
time capsule
After joining Lily Killer, check the old treasure chest on the first floor of the
Flash Tower.
106
Start conquering the Monkey Kingdom
Reach the monkey kingdom
107
Conquest of the monkey kingdom
Defeat the king monkey and exit to the field map
108
Defeat the King Monkey
Defeat the king monkey
109
secret hot spring sword
Obtain Liberation Sword Yagrush
110
Battle of the Second Empire begins
Reach the Second Empire
111
end of war
Finish the event battle after defeating the Emperor
112
A broken thread from another world
Obtained in an event after the end of the war
113
spun into another world
Defeat Diablo
114
The final battle begins
Obtained at the start of Chapter 5
115
Achieved world domination
Defeat Breskarth
116
Defeat the King of the Sewers
Defeat the powerful enemy Sludge Megaton at the end of the hidden
passage in the nursery sewer.
117
Defeat the bud of the world tree
Defeat the powerful enemy World Tree Bud
118
Defeat the unparalleled samurai
Defeat Kudan
119
Defeat the blessing curse
Defeat Breskarth
120
robe of darkness
Treasure chest at the end of the hidden passage to the right of the Imperial
Palace throne
121
garment of light
Treasure chest beyond the Reverse World Tree hidden room
122
DemonsRoots clear
See the ending
123
phantom battle
Examine the mirror in the warehouse during takeover play
124
Settlement
Defeat the commander-in-chief
125
true conclusion
defeat the king
126
Defeat Tenka Taihei
Defeat Tenka Taihei, who can be fought by heading to Saint Colosseum in a
lap play.
127
Weapon of destruction from another
world
Investigate the Boheros Bazaar showcase that appears during play laps.
128
Defeat super blessing
Examine the pillar in front of the Reverse World Tree Singularity boss to
defeat the strengthened final boss.
129
Thanks for playing!
Select Give Me Achievement in the creator’s room in the Monkey Kingdom
during a repeat play.
Summary of hidden rooms (passages) and hidden treasure chests
Prologue
place
item
how to get
Boheros Bazaar ( location
image )
topaz
Talk to the peddler at the bottom right of the bazaar
(Achievement: Get Treasure! Nimanima)
Prayer path ( place image )
fragment of power
Treasure chest at the back of the forest hidden passage on the way
to the Boheros statue
(Achievement: Items in the forest)
Examine the stone monuments according to the numbers in the image
on the Prayer Path, and
finally the underground area you can go to after examining the stone
statue.
Prayer path
( location image 1 , location
image 2 )
Treasure Boheros
Liberation Sword
Chapter 1
place
item
how to get
Tortoise Dungeon
( location image )
hidden
passage
Examine the wall of the upper right room in the prison area where Despolica was in
Tortoise Dungeon (Achievement: Secret room released)
There is a hidden passage in the room to the right of the area where you fought King
Tortoise
(Achievement: Hidden property)
Tortoise Palace
( location image )
spirit soul
stone
Treasure
Wraith’s
Silver Spear
Singana
( location image )
The stairs to the basement will appear after going around the rock in the cave about 10
times.
Singana Old Fort
( location image )
blue talisman
A hidden passage that appears when you press the lever that activates the hidden
passage and
examine the wall to the left (Achievement: Hidden Fortress Room)
Chapter 2
place
item
how to get
Prana Trading Country Behind the
Scenes
( Location Image 1 , Location Image 2 )
Treasure Karin’s Bone Fist
Examine the graves in the order of the images
Saint Colosseum ( location image )
Poison fang x50
Hidden stairs in the southeast of the hunting area
(Achievement: Gladiator’s Will)
Phantom Forest
( location image 1 , location image
2 , location image 3 )
Treasure : Staff of the Chief
of the Phantom Forest
You can get it by following the image
The mighty waterfall of destiny
( location image)
Wraith’s Silver Spear
Climb the rope that appears when you examine the lower
wall of the area with three entrances and exits
(Achievement: Item hidden in the waterfall)
The innermost part of the magic
barrier Rukuruk student dormitory
( location image)
hidden save
Examine the wall in the bottom right corner of the student
dormitory (Achievement: Hidden save)
Boheros training ground
( location image)
spirit soul stone
Hidden passage in the wall near where you fought Imperial
Knight Roen
(Achievement: Hidden room found)
Chapter 3
place
item
how to get
Below the area where you learned the energy drink on the second floor of the
watchtower after conquering Orfe
(Achievement: Hidden item)
Ofe Watchtower 2nd floor
( location image )
spirit soul
stone
Go down the stairs at the end of the hidden passage on the right wall and open
the shortcut
(Achievement: Shortcut opened)
Ofe Watchtower 2nd floor
( location image )
hidden
passage
Go through the hidden passageway beyond the prison wall that can be opened
with the West Key and
turn off the magic device (Achievement: Magic Device Off)
Great Magic Prison Prison
( location image )
hidden
passage
Great Magic Prison Prison
( location image )
spirit staff
Treasure chest at the end of the hidden passage on the left wall of the area
before the boss battle
(Achievement: Hidden Staff)
Chapter 4
place
item
how to get
Tower of Flash 1st floor
time capsule
Open the old treasure chest on the first floor after joining Lily Killer
(Achievement: Time Capsule)
In the kitchen at the end of the secret passage at the bottom of the assassination
squad room, climb up the ladder and go down the ladder above the passage. On the
lower wall of the room
(Achievement: Hidden Weapon)
Third Empire hidden
room
( location image )
emergency
dagger
Sacred place Persias
underground temple
( location image )
Examine the showcase at the end of the hidden passageway in the room of
admonitions
(Achievement: Otherworldly weapons! 2)
skill
acquisition
Underground temple
eternal training
( location image )
Vorpal Dagger Investigate the corpse at the end of the hidden passageway on the lower wall
(Achievement: Hidden Weapon)
Third Reich Battle Stage
( location image )
kill rifle
Investigate the passage in the gap in the wall
(Achievement: Dark Gun)
Chapter 5
place
item
how to get
Imperial Palace Throne
( Location Image 1 / Location
Image 2 )
Examine the wall beyond the hidden passage to the right of the throne
in the Imperial Palace
(Achievement: Cloak of Darkness)
cloak of everlasting
darkness
In the area after moving two spaces from the Reverse World Tree
entrance,
search the north wall to find the hidden room
(Achievement: Cloth of Light)
Reverse World Tree
( location image )
cloak of light
Handover play
place
item
how to get
Boheros Bazaar
javelin
Examine the showcase and pay 200,000G
(Achievement: Otherworldly Destructive Weapon)
Strong Enemy Location
Tortoise Palace: Synthetic Magical Creatures
It’s a pretty tough opponent to take on in the first chapter.
You can get items to weaken him in Doremifa Kingdom, which you can go to later, so it is recommended to challenge him after
that.
Its weak point is the water attribute, so if you take countermeasures with equipment and skills, you can fight to your advantage.
If you win, you will receive the achievement ” Defeating Magical Creatures “.
Torkia Dragon’s Cave: Fafnir
In the cave at the end of the passage lined with dragons.
It’s stronger than a dragon, and once you’re here, it’s tough to challenge.
It uses a lot of all-over attacks, so it’s easier to fight if you dress Ange in something like the dragon king’s cloak to attract enemy
attacks.
If you win, you will receive the achievement ” Defeating Fafnir “.
Magical Barrier Rukurukku Staff Room: Plant Magical Creatures
Located in front of the door in the northeast of the schoolyard.
It is weak to fire attributes, so Kalinka’s Flame Gladius etc. are effective.
If you win, you will receive the achievement ” Plant Magical Creature “.
Deep in the Paro Mountains: Super Beast Gon
can be fought in the deepest part of the Paro Mountains.
Although it is possible to fight against a very powerful opponent from an early stage, it is recommended to challenge it in the
later stages.
It will inflict a stunner on everyone with its “Super Beast’s Eyes”, so be sure to take countermeasures with your equipment.
If you win, you will receive the achievement ” Miraculous Victory “.
Command Room: Beyond the Mark 6
After defeating the boss in the Armageddon EX Dungeon “Brainwashed Soldier Area”, speak to Brain Yellow and use the
“Access Key” to proceed to the back of the left area of the Command Room to fight.
It will inflict a stun state, so be sure to counteract it with equipment such as Ange, who plays the role of a wall.
It is weak to lightning attributes, so attacking with corresponding equipment and skills will easily reduce its HP.
If you win, you will receive the achievement ” Secret Weapon Destruction “.
3rd Empire Underground Waterway: Shark
After conquering the 3rd Empire, you can fight by boarding the small boat at the bottom left of the area where you proceed
using the underground waterway transfer device.
It has a lot of HP, so be sure to raise your level and prepare your equipment before you challenge it.
If you win, you will receive the achievement ” He was the one who touched the shark! ”.
Sewers: Sludge Megaton
You can head to the sewers at the nursery before heading to the Reverse World Tree.
There is a hidden passage on the right wall near the entrance, and you can fight at the end.
During battle, it will become stronger the more you defeat Sludge, so refrain from attacking it entirely.
If you defeat it, you will receive the achievement ” Defeating the King of the Sewers “.
Reverse World Tree: World Tree Bud
In the area on the left along the way.
If you win, you will receive the achievement ” Defeating the World Tree’s Bud .”
Reverse World Tree: Last boss (strengthened)
Opponent you can fight during takeover play.
If you examine the pillar before challenging the Reverse World Tree Singularity final boss, you can fight an enhanced individual.
The “Super Blessing” given at the beginning cannot be canceled even by Lost Innocent. The overall firepower has increased,
and the “Stupid Tsurugi” attacks the entire enemy, ignoring Ange’s attraction, so a certain amount of durability is also required.
If you win, you will receive the achievement ” Super Blessing Defeat “.
Saint Colosseum: Tenka Taihei
If you enter the Saint Colosseum before the decisive battle with the Emperor in Chapter 4 during a takeover play, you can fight
him.
After the message “Saving up power” appears, it will use a powerful attack called Tenka Katsuzai, so use Ange’s Aegis Storm,
etc. to block it.
If you win, you will receive the achievement ” Defeating the Tenka Taihei .”
Throne of Destiny: Command Tower
In Another Episode, which can be played from the warehouse in Boheros’ mansion that can be accessed through takeover play,
you can fight by heading to the throne in Boheros castle.
There are four enemies, each with boss-class HP and attack power.
While dodging enemy attacks with Ange, aim to defeat each one with Kalinka’s mission blows.
If you win, you will receive the achievement ” Settlement “.
Land of Fellowship: King
After defeating the Control Tower, you can fight at the door beyond the throne.
Since this is a very powerful opponent, you’ll want to prepare some status enhancements using fragment-type items and some
spirit soul stones.
When a thunder-like sound and a flashing screen appear, the king unleashes an attack called the “Blade of Hope.”
It is difficult to withstand as you will receive about 10,000 damage from a certain attack.
It can be canceled by slipping it using Narjejita’s secret technique “Imperial Style Decimal Sword”.
Considering the possibility that you won’t be able to use the secret technique in time or miss the attack,
equip Ange with her mother’s pendant (which withstands with 1 HP), and if she gets hit, use the spirit soul stone to rebuild her
at once.
If you win, you will receive the achievement ” True Settlement “. Obtain the ” King’s Token ” from the treasure chest in the back.
EX Dungeon Section
The EX dungeon “Monkey Kingdom” is described in Chapter 4 of the story strategy.
EX Dungeon “Sludge Underground Cavern”
When you reach the end, you’ll be in a battle with 6x Sludge Cake.
Create a state where TP is easy to accumulate by turning roots, etc., and attack with Demon Roots to stabilize it.
If you win, you will receive ” Puyo Puyo x30 ” and the achievement ” Sludge Underground Cavern Conquest! ”.
item
Spirit stone x3
Turned roots x5
Antidote fruit x4
Sakuraba×2
Scroll of Return x2
All-purpose mushroom x2
super sludge dagger
monster
monster
Experience point
money
drop items
sludgebone
390EXP
10G
Bone, Sludge Dagger, Puyo Puyo
brain spore
950EXP
500G
inspirational mushroom
Derro
400EXP
10G
Sakuraba, pointed fangs
Doro
75EXP
10G
none?
sludge cake
600EXP
10G
Sludge dagger, spirit stone
EX Dungeon “Extremist Hideout”
Be careful as you will be damaged if you pass over the needle trap.
When you reach the end, you’ll be in a battle with an extremist leader.
If you win, you will receive the achievement ” Extremist Hideout Conquest! ”
item
piece of speed
fragment of power
Recovery pure water x 9
Recovery ultrapure water x3
Scroll of Return x2
Wraith Fire Spear
monster
monster
Experience point
money
drop items
extremists
520EXP
490G
recovery water, recovery pure water
slave warrior
410EXP
0G
Mana
brain spore
950EXP
500G
inspirational mushroom
EX Dungeon “Underground Hot Spring”
If you go all the way to the end, you’ll be in a battle with Lokifolk x2.
Since it mainly attacks with lightning magic, it is recommended to silence it with Silence etc.
If you win, you will receive the achievement ” Battle Vein Strategy “.
item
topaz
Fragment of reason (pot)
Fragment of power (pot)
Turned roots x 4
spirit stone
scroll of return
tail of the storm
monster
monster
Experience point
money
drop items
Roxic
750EXP
500G
Recovery Pure Water, Tail of the Wind
Loppy
500EXP
100G
tail of the wind
Derro
400EXP
10G
Sakuraba, pointed fangs
EX Dungeon “Underground Classroom”
First, head southeast and go down the stairs to get the ” Punishment Room Key”.
After that, go down the stairs to the southwest and you’ll be in a boss battle with the delinquent magic devices.
If you win, you will receive the achievement ” Teaching students using physical language .”
item
Spirit stone x2
tiara
Recovery ultrapure water x2
All-purpose mushroom
Fragment of reason (pot)
Moonflower × 7
Sakuraba×7
Turned roots x 2
Magic Staff Azoth
scroll of return
monster
monster
Experience point money drop items
Student/Seikai Committee
760EXP
900G
recovery pure water
student/delinquent
2200 EXP
1200G Enhanced resuscitation drug
Student/fire department committee member
740EXP
750G
Recovery pure water, Enhanced resuscitation potion
Fire and Ice Wisp
600EXP
10G
high heel hat, mana
deadbone knight
1750EXP
1600G Recovery pure water, Enhanced resuscitation potion
EX Dungeon “Brainwashed Soldier Area”
Follow the path and press the switch on the device to make the laser blocking the path disappear.
Go down the fork in the road and go to the back area for a boss battle with Brain Red and his friends.
If you win, you will receive the achievement ” Suppress Brainwashed Soldiers “.
After you win, talk to Brain Yellow to get an ” access key” that will allow you to open the door to the control room.
item
Enhanced resuscitation drug
spirit stone
Shotgun bullets x7
scroll of return
Rocket bullet x2
Recovery pure water x 4
spirit soul stone
piece of speed
Spirit stone x2
scroll of return
revolver
monster
monster
Experience point
money
drop items
brainwashed soldier
1200EXP
13500G
Enhanced resuscitation drug
Fire and Ice Wisp
600EXP
10G
high heel hat, mana
earth breeze wisp
600EXP
10G
Mana
assault club
2200 EXP
1900G
shotgun bullet
About the Execution Dungeon
Basic procedure
An execution dungeon that can be challenged during BADEND.
When challenging this dungeon, Despolica and his friends are greatly weakened, and are now able to die in one hit from enemy
attacks.
Despolica Lily Killer’s “Keru” is the only way to damage the enemy;
other allies’ “Struggle” will not deal any damage at all.
Therefore, the basic idea is to protect Despolica and Lily Killer by “covering” them .
If you examine the red crystals on each floor, you will be able to obtain a ” murky resuscitation potion ” after the sex scene,
and if you use it, you will be able to recover one of your allies who is unable to fight.
You can advance to the lower floor by obtaining the key located somewhere on each floor.
There are 20 floors in all, and there are no special items or achievements that can be obtained except for a few special battles
at the bottom, so
there is no need to go all the way to the bottom, and it is extremely difficult to reach the bottom.
The person who posted the video below provides a very easy-to-understand explanation, so
please use it as a reference for how to get to the bottom.
Click to view: Events that occur at the bottom (spoiler alert)
About the enemies that appear
・Maru
His action speed is fast and he can definitely make one person unable to fight with anything other than items such as ” Rotten
Dagger “.
・Large enemies that appear on milestone floors such as Executioner 5 and 10F.
It requires 2 damage to defeat, and it uses an all-out attack. An opponent who needs two allies to protect them.
・Tori
It has a fast action speed and moves faster than an ally’s cover, so it will be random who will attack you.
・Special Execution Participant
: He acts like he’s grinning and doesn’t attack, so you can defeat him unharmed.
・Premium Execution Participant
Shining soldiers will drop ” Spirit Soul Stones” when defeated. It’s a valuable item in the execution dungeon where you can fully
recover everyone, so be sure to get it.
・Three Mitsugo appear at the same time. Since its action speed is slow, you can defeat it unharmed by using the “Discarded
Scrolls” that you can pick up along the way, in addition to using Despolica, and Lily Killer .
・Ryu
Appears in the latter half of the floor. It takes 3 damage to defeat and releases an all-out attack.
Floor strategy information
If you choose the preferential execution participant’s route above, you can break through the enemy locations blocking the path
on B2F unscathed.
You can avoid one battle by going through the secret passage on B4F. Defeat the two enemies in the center and a key will
appear in the bottom left.

You can get the key by defeating the executioner on B5F. Prepare two people to protect you.
You can explore the floor by passing through the hidden passage on B6F. “Dangerous Potion” is an item that can withstand
heavy damage with just 1 HP.

A “premium preferential execution participant” is hidden at the bottom left of B7F, and when defeated, it will drop a spirit soul
stone.
You can defeat it without any damage, so be sure to get it.


The real key to B8F is where you defeated the enemy in the upper left.
After defeating the monster in the lower right, there is a hidden passageway where you can pick up the “Discarded Scroll.”

B9F
There are many hidden passages in this room, which can be broken through by fighting only the enemy in front of the key.


A key will appear if you go around the area on the right side of B12F several times around the area where the three figures are
spinning.
If it doesn’t appear, it may appear if you walk around it a little.
This is an area that can be penetrated without a battle.
You can get the key by going through the hidden passage on B13F .

The “Discarded Scroll” on the top left of B14F can be retrieved without a battle by going through a hidden passage.
The monster blocking the key moves at regular intervals, so you can get the key without fighting.


You’ll be fighting a dragon heading to the lower floor of B15F, so be prepared in advance.

If you go through the hidden passage on B16F, you can get the “Discarded Scroll”.

The red circle near the stairs on B17F will block the path if you pass the path to the left and right.
If you guide Akamaru many times on the left and right paths, it will disappear and you can pass through it without fighting.
After defeating the three bodies at the bottom left of B18F, there is a hidden passageway where you can get the key.

A “Premium Special Execution Participant” is hidden in the lower left of B19F, and when defeated, it will drop a Spirit Soul Stone.
There is a key in the center, but you won’t need it on the next floor, so there’s no need to go get it.

You can obtain the “Rotten Dagger” by defeating Akamaru at the end of the hidden passageway on B20F .

Various data
Shop data
Boheros Bazaar Merchant
item
price
effect
dueling ocarina
19999 Lures enemies when used on the menu screen
hometown ocarina
49999 When used on the menu screen, it has the same effect as an institution scroll.
sludge dagger
10000 Attack power +12, speed +10, water attribute, low probability of poisoning
fire needle
15000 Attack power +15, speed +6, fire attribute, low probability of inflicting burns
tail of the wind
20000 Attack power +23, wind attribute, hit rate +20%
mushroom head
25000 Attack power +10, defense power +22, magic defense +5, luck +10
high heel hat
30000 Defense power +10, magic power +10, magic defense +15, luck +10, high heels can be used
all might hat
30000 Defense power +15, magic power +20, magic defense +20, luck +10, All Might can be used
Tortoise City Weapon Shop
item
price
effect
bronze knife
1200
Attack power +10, Evasion/Critical rate +5%
bronze sword
1500
Attack power +15
bronze rod
1300
Attack power +3, magic power +15, magic defense +11
bronze spear
1200
Attack power +12, defense power +5
bronze knuckles
1200
Attack power +16, speed +20, accuracy rate +20%
Tortoise City Armor Shop
item
price
effect
bronze buckler
1600
Defense power +8, evasion rate +5%
bronze shield
2000
Defense power +20, magic defense +10, speed -10, evasion rate -5%
bronze clip
900
Defense +10
bronze helm
1300
Defense power +14, speed -10, evasion rate -10%
bronze plate
1300
Defense +15, Speed -5
bronze armor
2000
Defense power +25, speed -10, evasion rate -10%
Tortoise town tool shop
item
price
effect
recovery water
250
HP600 recovery
Mana
2000
MP20% recovery
resuscitation medicine
800
Incapacity recovery & recovery turn 1000 damage nullification
Demolition powder
8000
Halves chance of random encounters
Prana Commercial Country Tools Shop
item
price
effect
recovery water
250
HP600 recovery
Mana
2000
MP20% recovery
resuscitation medicine
800
Incapacity recovery & recovery turn 1000 damage nullification
Prana Merchant Weapon Shop
item
price
effect
Jamadahar
350000 Attack power +55, speed +18, luck +14, evasion rate/crit rate +10%, number of normal attacks +1
Wraith’s Silver Spear 400000 Attack power +50, defense power +10, speed +10, evasion rate +15%
golden globe
500000 Attack power +69, speed +20, hit rate +20%
Prana Commercial Jewelry Store
item
price
effect
topaz
30000
Defense power +3, magic defense +10, lightning damage cut by 20%
Ruby
30000
Defense power +3, magic defense +10, fire damage cut by 20%
sapphire
30000
Defense power +3, magic defense +10, ice damage cut by 20%
lapis lazuli
200000
Defense power +10, magic defense +15, probability of all status abnormalities halved
diamond
900000
Magic power +30, magic defense +10, luck +50, all attributes cut by 10%
Eternal Neutral Country Cumin Tool Shop
item
price
effect
recovery water
250
HP600 recovery
recovery pure water
1000
HP1500 recovery
Mana
2000
MP20% recovery
Limana
4000
MP40% recovery
resuscitation medicine
800
Incapacity recovery & recovery turn 1000 damage nullification
Enhanced resuscitation drug
500
Incapacity recovery & recovery turn 5000 damage nullification
Eternal Neutral Country Cumin Weapon Shop
item
price
effect
mithril knife
9000
Attack power +20, speed +14, luck +14, evasion rate/critic rate +5%
mithril sword
14000
Attack power +45
mithril rod
13000
Attack power +10, magic power +51, magic defense +10
Mithril Spear
14000
Attack power +36, defense power +10
mithril knuckle
8000
Attack power +56, speed +20
Eternal Neutral Country Cumin Armor Shop
item
price
effect
Mithril Backura
16000
Defense +25
mithril shield
18000
Defense power +50, magic defense +20, speed -10, evasion rate -5%
mithril helm
12000
Defense power +40, speed -10, evasion rate -5%
mithril plate
15000
Defense +35, Speed -5
mithril armor
20000
Defense power +64, speed -20, evasion rate -10%
circlet
21000
Defense +29, Magic Defense +22, MP +80
Doremi Kingdom Dream Shop
item
coin
effect
crane whip
50
Attack power +21, speed +10, overall attack
anal jewelry
500
Defense +5, Magic Defense +25
Treasure information <Boheros>
3000 You can see the location of Boheros’ treasures.
Treasure information <Wraith>
5000 You can see the location of Singana’s treasure.
Strong enemy information <Tortoise>
500
Weakens synthetic magical creatures
Bromide <M>
Ten
You can view photos by using from the menu
Bromide<P>
100
You can view photos by using from the menu
Bromide<A>
100
You can view photos by using from the menu
Bromide<K>
100
You can view photos by using from the menu
Treasure information <Karin>
5000 You can see the hidden treasures of Prana Trading Kingdom.
Strong enemy information <Tolkia>
1000 weaken Fafnir
genuine leather whip
150
Attack power +41, speed +10, overall attack
radical underwear
500
Defense +5, TP recovery +5%
Bromide<S>
100
You can view photos by using from the menu
Treasure information <Phantom Forest>
5000 You can see the location of the hidden treasure in the Forest of Illusion.
Strong enemy information <Rukuruk>
1000 Weakens commercial magical creatures
stiletto heels
500
Attack power +15, speed -10, luck +10
Bromide<D>
100
You can view photos by using from the menu
Treasure chest information <Boheros>
1000 You can see the password to the Boheros treasure chest.
Strong enemy information <Ofe>
1000 Weakens the special magician
queen’s whip
600
Attack power +59, speed +12, overall attack
female pig cloak
500
Defense +30, Magic Defense +10,
Bromide <N>
100
You can view photos by using from the menu
Treasure chest information <Third Reich>
1000 You can see the password to the Third Reich treasure chest.
Treasure chest information <Shingana>
1000 You can see the password to Shingana’s treasure chest.
Dark Whip
1200 Attack power +80, speed +12, overall attack, dark attribute
red rough rope
500
Attack power +30, defense power +5, magic defense +30, MP +200
Bromide <L>
100
You can view photos by using from the menu
Treasure chest information <Persias>
1000 You can see the password to Versius’s treasure chest.
goddess’s whip
2500 Attack power +110, speed +12, overall attack, light attribute
Hanna’s store
item
price
effect
recovery water
250
HP600 recovery
recovery pure water
1000
HP1500 recovery
Mana
2000
MP20% recovery
Limana
4000
MP40% recovery
resuscitation medicine
800
Incapacity recovery & recovery turn 1000 damage nullification
Enhanced resuscitation drug
500
Incapacity recovery & recovery turn 5000 damage nullification
patience medicine
5000
Even if HP goes to 0 once for 2 turns, stay at HP 1.
bronze buckler
1600
Defense power +8, evasion rate +5%
bronze clip
900
Defense +10
bronze helm
1300
Defense power +14, speed -10, evasion rate -10%
bronze plate
1300
Defense +15, Speed -5
bronze armor
2000
Defense power +25, speed -10, evasion rate -10%
Skill list
Despolica
skill
Acquired Lv
effect
demon roots
Prologue event
Dark damage to all enemies & medium chance of slipping
old fog
initial
Damages 2 enemies and causes darkness with medium probability
origin roots
event
Dark damage to all enemies & moderate chance of inflicting stun state
Hanagiri
event
A sure hit attack on a single enemy that ignores defense.
Setsugekka
event
Ice damage to all enemies
Kyoka Suigetsu
event
Dark damage to a single enemy
Heel
initial
Restores a small amount of HP to a single ally
Nagi root
Lv7
Slightly increases defense power of all allies for 3 turns
recovery
Lv12
Recovers poison, confusion, paralysis, and stun from a single ally.
Loki’s Thorns
Lv14
Slightly increases attack power of all allies for 3 turns
aura
Lv15
Recovers a small amount of HP for all allies
high heels
Lv20
Recovers a moderate amount of HP for a single ally.
ghee seeds
Lv24
Counter state to physical attack for 3 turns & add poison state with low probability
celery leaves
Lv27
Slightly increases magic defense of all allies for 3 turns
Rays
Lv30
Revive a single ally
cannibalus plants
Lv31
Earth attribute attack on a single enemy & absorbs HP/TP
bloody rose
Lv33
Attack that ignores defense on a single enemy
high aura
Lv35
Recovers a moderate amount of HP for all allies
Devil Buri Girl
Lv39
Become less likely to be targeted by enemies
chimeric seed
Lv46
Consumes 30% of own HP to attack all enemies
full heel
Lv50
Greatly recovers a single ally’s HP
high raise
Lv55
Revives a single ally and recovers a large amount of HP
Mei’s dew
Lv61
Recovers 20% of HP, MP, and TP of all allies.
full aura
Lv69
Greatly recovers HP of all allies
all might
Lv72
Cures all status ailments for a single ally
Ange
skill
Acquired
Lv
effect
Aegis Storm
event
Super evasion & protect all allies & HP recovery & defense/magic defense up for 3 turns
call out
initial
Probability to make slave enemies retreat
slave knight
shield
initial
Protects all allies for 1 turn
silence
initial
Moderate chance to silence a single enemy
Brush washing
Lv7
Guaranteed single attack
Heel
Lv9
Restores a small amount of HP to a single ally
Peel off
Lv10
Increases evasion rate by 10% for 4 turns
broken water
Lv12
Water magic damage to a single enemy
Cure
Lv14
Recovers darkness, burns, sleep, and bleeding from a single ally.
sleep
Lv16
Put all enemies to sleep with a low probability
wind flash
Lv18
Wind attribute attack on a single enemy
high heels
Lv20
Recovers a moderate amount of HP for a single ally.
backwater shield Lv22
Protects all allies for 2 turns & increases own evasion rate by 10%
Suisakuga
Lv28
Heavy water damage to a single enemy
Kamikaze flash
Lv36
Heavy wind damage to a single enemy
recovery
Lv40
Recovers poison, paralysis, confusion, and stun from a single ally.
Super peel off
Lv45
Increases own evasion rate by 20% for 2 turns
full heel
Lv49
Recovers a moderate amount of HP for a single ally.
Wind God’s
Shield
Lv62
Protects all allies for 2 turns & increases own evasion rate by 20% & increases defense and magic
defense
Kalinka
skill
Acquired Lv effect
A blow of mission
event
Single attack that ignores defense power & large damage to humans
Parry
initial
Hate up for 1 turn & enters physical counter state
gladius
Lv7
Single attack that causes great damage to humans
buster
Lv10
Increase own attack power by 1.5x for 4 turns
flame gladius
Lv24
Single fire attribute attack
Strong guard
Lv29
Protects all allies for 1 turn & lowers defense/magic defense
chariot
Lv31
Attack all enemies
mega buster
Lv35
Increase own attack power by 1.8x for 3 turns (can overlap with lower skills such as Buster)
Maparii
Lv39
Hate up for 1 turn & enters magic counter state
Storm Gladius
Lv44
Wind attribute single attack
saint gladius
Lv51
Light attribute single attack
giga buster
Lv55
Doubles own attack power for 2 turns (can overlap with lower skills such as Buster)
grand chariot
Lv61
Attack all enemies
Demon god descends Lv66
Increases own TP charge rate, accuracy, avoidance, and speed for 3 turns
Salasa
skill
Acquired Lv effect
prism torism
event
Light attribute attack on all enemies & lowers magic defense for 2 turns
magic barrier
initial
Nullifies own damage up to 2000
negative flare
initial
Dark attribute damage to all enemies
fire ray
Lv5
Heavy fire damage to a single enemy
freeze ray
Lv6
Heavy ice damage to a single enemy
thunder ray
Lv7
Heavy lightning damage to a single enemy
high flare
Lv22
Heavy fire damage to all enemies
high hail
Lv24
Heavy ice damage to all enemies
high electric
Lv26
Heavy lightning damage to all enemies
magic break
Lv30
Lowers magic attack of a single enemy for 3 turns (can be stacked in 1 stage)
fire magna
Lv32
Massive fire damage to a single enemy
Freeze Magna
Lv34
Huge ice damage to a single enemy
Thunder Magna
Lv36
Huge lightning damage to a single enemy
shade
Lv40
Heavy dark damage to a single enemy
Emergency magic power return
Lv42
Consumes 80% HP and recovers 300 MP.
interlocking barrier
Lv44
Nullify damage of all allies up to 2000
mega flare
Lv50
Huge fire damage to all enemies
Mega Hale
Lv55
Massive ice damage to all enemies
mega electric
Lv60
Huge lightning damage to all enemies
demon gaia
Lv65
Huge dark attribute damage to all enemies
invincible barrier
Lv73
Consumes 99% of HP & nullifies own damage up to 5000
Diana
skill
Acquired Lv
effect
club maga
initial
Attacks a single enemy & stuns with low probability
machine gun
mark 6 event
Damages a single enemy and causes bleeding with a low chance
Shotgun
mark 6 event
Random damage to 3 enemies
energy drink
watchtower event
Recovers 10 TP for a single ally for 3 turns
Molotov cocktail
Tower of Light event
Fire damage to a single enemy & moderate chance of causing burns
rocket launcher
maximus event
Great damage to all enemies & low probability of fainting
heavy machine gun Persias underground temple
event
Damages a single enemy and causes bleeding with a low chance
javelin
Boheros Bazaar at the time of
transfer
Damages all enemies & has a medium chance to stun them
stun rod
Lv10
Lightning damage to a single enemy & low chance of paralysis
weapon break
Lv14
Reduces enemy’s attack power for 3 turns
sneaking
Lv19
3 turn hate reduction
kick ass
Lv31
Lowers the defense of a single enemy for 3 turns (can be stacked in 1
stage)
First Aid
Lv36
Recovers 2000 HP & 15 TP for a single ally
emergency
treatment
Lv47
Recovery from status ailments for a single ally & nullification of status
ailments for 3 turns
Nadjejita
skill
Acquired Lv
effect
imperial style decimal
sword
initial
Damages all enemies and has a high chance of slipping.
electro blade
initial
Lightning damage to a single enemy & high chance of reducing
lightning resistance
machine gun
Persias underground temple
event
Damages a single enemy and causes bleeding with a low chance
aura
Lv8
Recovers a small amount of HP for all allies
Crane wing camp
Lv11
Increases accuracy of all allies for 2 turns
high heels
Lv15
Recovers a moderate amount of HP for a single ally.
cold blade
Lv19
Ice damage to a single enemy & high chance of reducing ice resistance
high aura
Lv25
Recovers a moderate amount of HP for all allies
burst blade
Lv26
Fire damage to a single enemy & high probability of reducing fire
resistance
full heel
Lv30
Greatly recovers a single ally’s HP
fish scale formation
Lv32
Increases critical rate of all allies for 2 turns
silence
Lv35
Moderate chance to silence a single enemy
quake
Lv40
Massive earth damage to all enemies
saint blade
Lv41
Light damage to a single enemy & high probability of light resistance
down
Gust
Lv45
Huge wind attribute damage to all enemies
holy
Lv50
Heavy light damage to all enemies
dark blade
Lv52
Dark damage to a single enemy & high probability of reducing dark
resistance
all might
Lv55
Cures all status ailments for a single ally
empire tactics
Lv61
Slightly increases all stats of all allies for 3 turns
full aura
Lv65
Greatly recovers HP of all allies
shining
Lv70
Huge light attribute damage to a single enemy
Remnant Mebius
skill
Acquired Lv
effect
dark red blade
initial
Dark-attribute advance attack
thread rain
initial
Guaranteed advance attack & TP25 recovery
passing shower
Lv22
Whole attack & lowers own defense for 1 turn
Chestnut flower drop
Lv28
Reduces attack/magic attack of a single enemy (can be stacked in 1 stage)
silence
Lv30
Moderate chance to silence a single enemy
thunderstorm
Lv31
Advance attack & lightning attribute attack on a single enemy
evil eye
Lv33
Paralyze all enemies with a low probability
red rain
Lv35
2 attacks that ignore defense
Thunder Magna
Lv40
Huge lightning damage to a single enemy
holy
Lv50
Heavy light damage to a single enemy
shining
Lv70
Huge light attribute damage to a single enemy
Lily killer
skill
Acquired Lv
effect
Disassembly
initial
Great damage to humans and moderate chance of inflicting bleeding status.
poisoning
initial
Accurate attack & medium chance to inflict poison status
pleasure
initial
Attack power/speed up for 3 turns & normal attack count +2
Horrible
initial
Attacks all enemies that cause heavy damage to humans
relief
initial
Crystal damage to a single enemy & lowers all status for 3 turns
crystallization
initial
HP recovers 1% and speed decreases by 20% until the end of the battle
metal
Lv20
Crystal damage to a single enemy & evasion rate reduced by 30% for 2 turns
bubble quartz
Lv30
Crystal damage to a single enemy & lowers attack/magic attack for 2 turns
heavy metal
Lv45
Massive crystal damage to a single enemy & 30% accuracy reduction for 2 turns
star rose
Lv50
Recovers status ailments for all allies & nullifies status ailments for 3 turns
dead blood
Lv61
Dark damage to a single enemy & defense/magic defense down for 4 turns